Fit Pumpkin Chocolate Chip Cookies (3 Ingredients Only!)

Fit Pumpkin Chocolate Chip Cookies | Mimi's Fit Foods

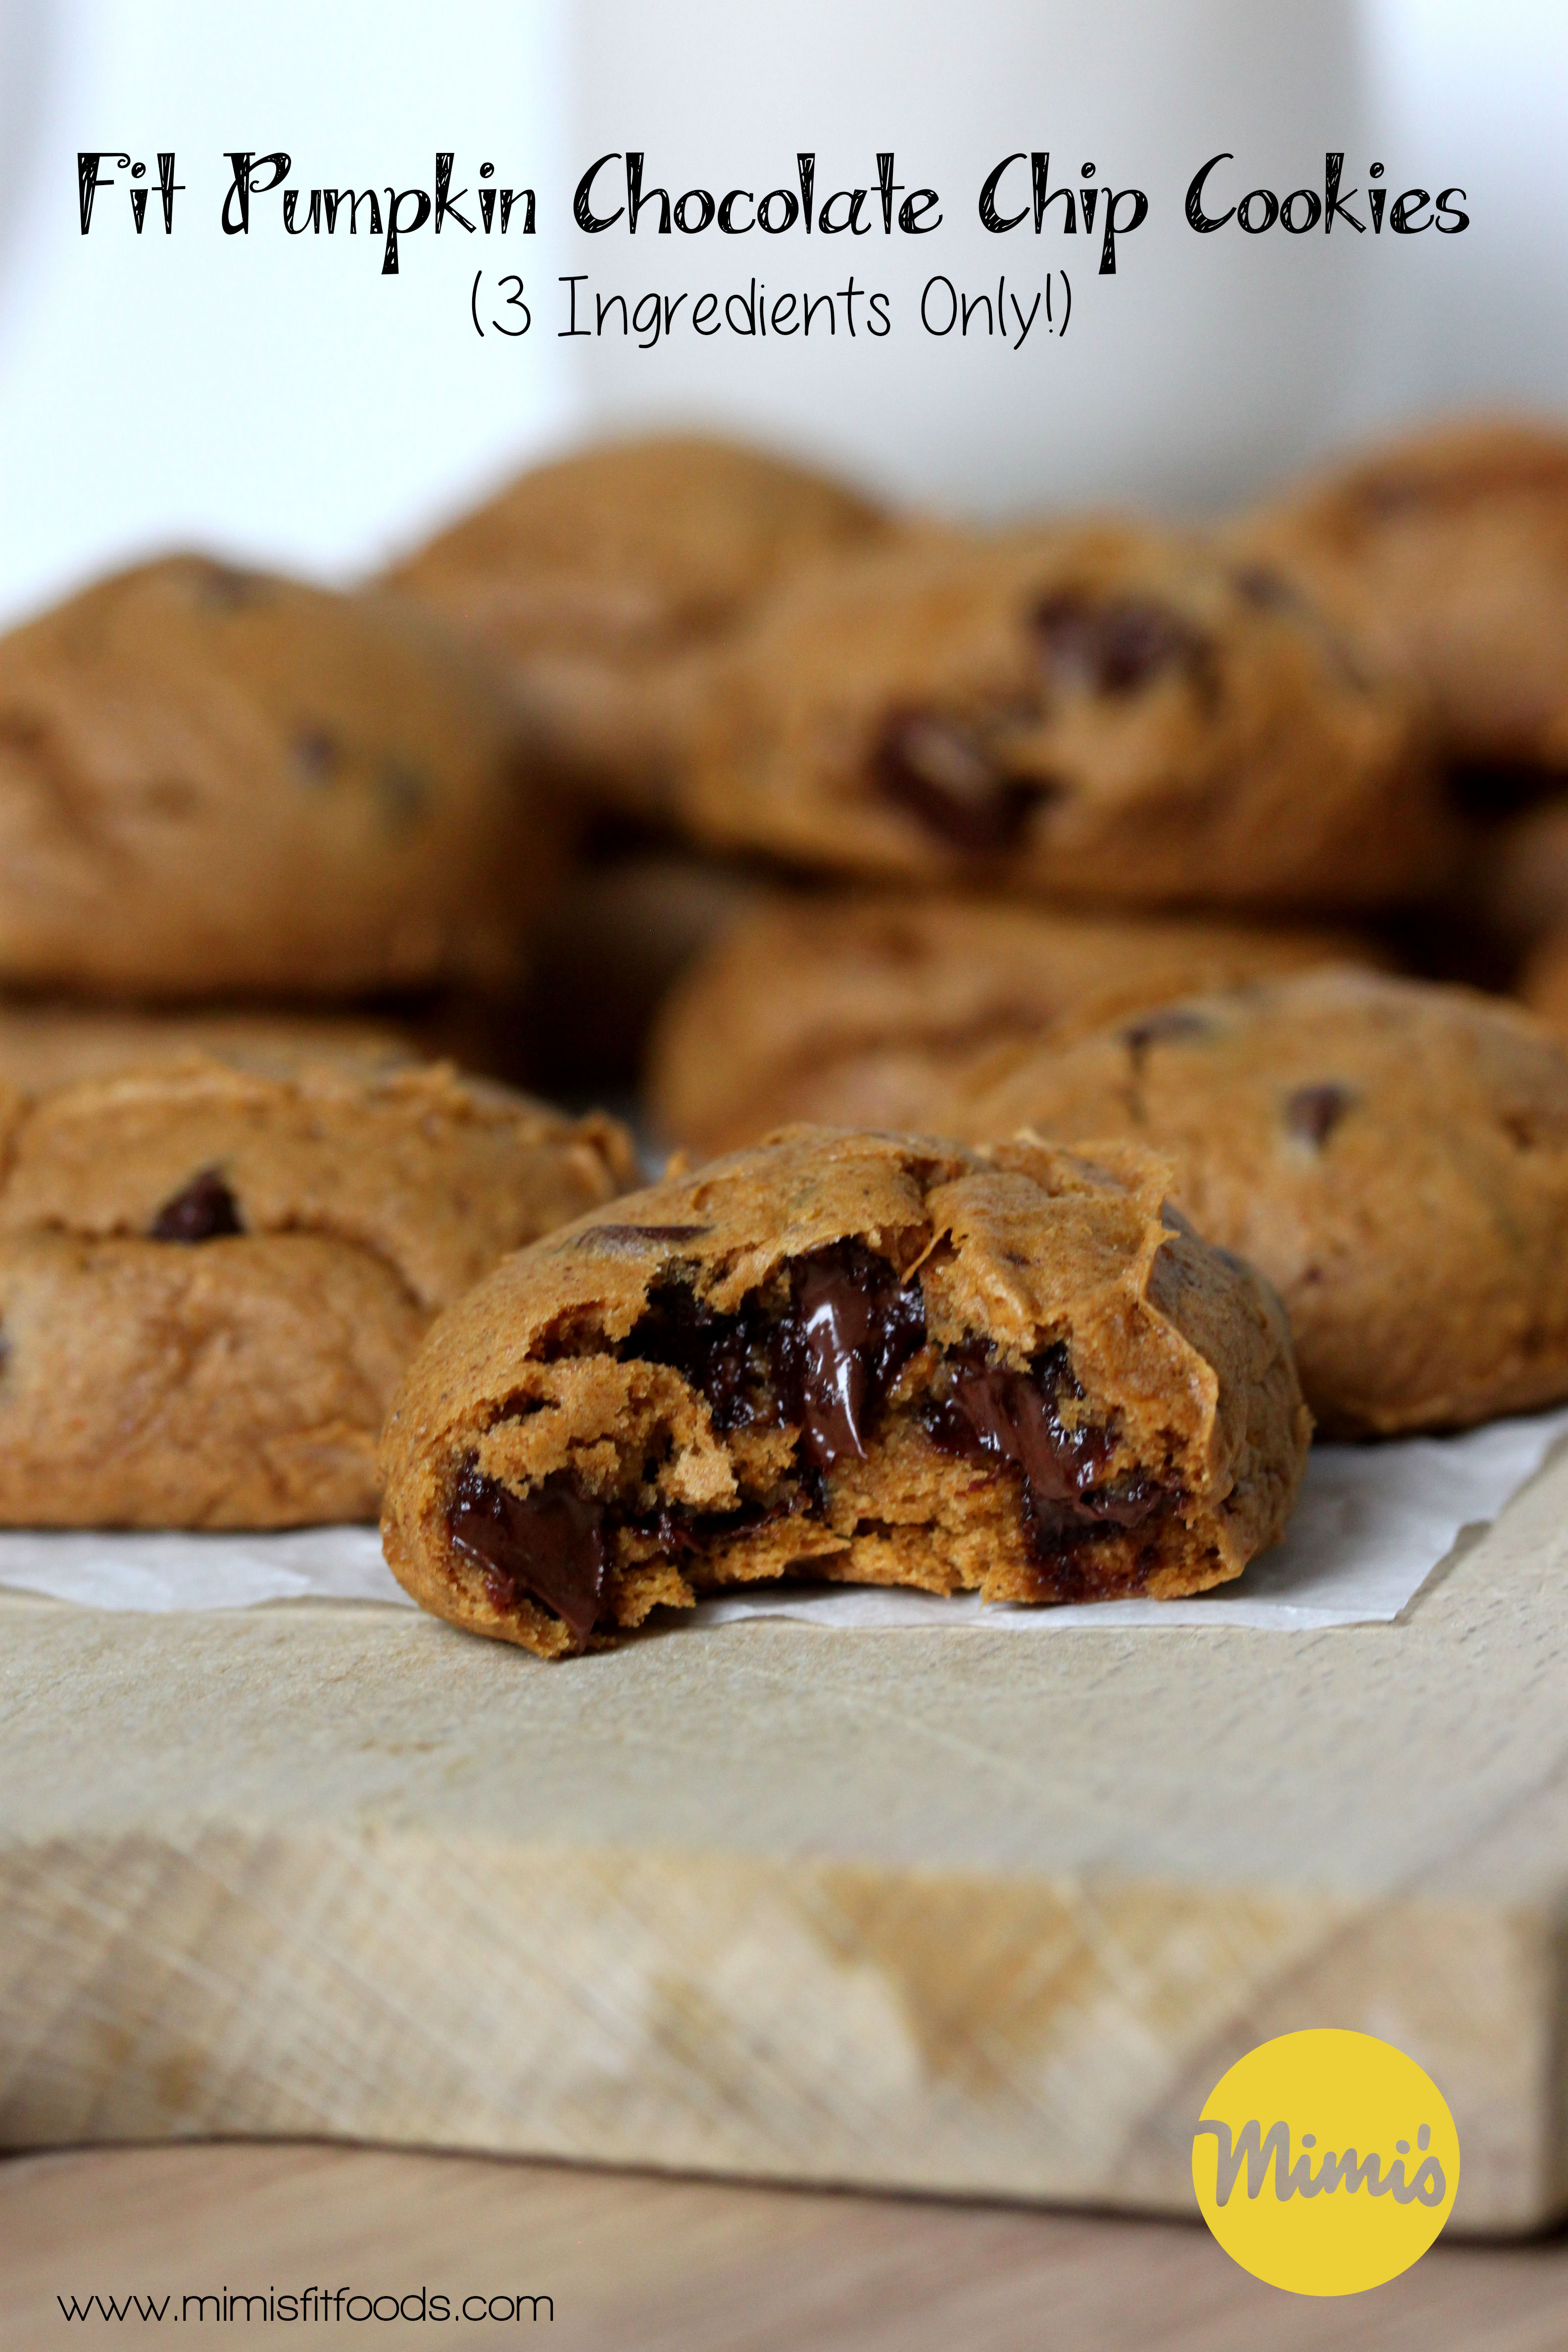
It’s officially Autumn so why not throw a pumpkin recipe your way?  Even better, a pumpkin cookie recipe with chocolate!  And, even better than that . . . a pumpkin/chocolate recipe cookie that only takes three ingredients and is ONLY 70 calories per cookie (remove the chocolate chips and you’ve got yourself a pumpkin cookie for ONLY 42 calories!).  Yah . . . pretty awesome wouldn’t you say?

I’m not really sure where I got this recipe.  I’ve seen it circle around Pinterest lately, but I’ve been making it for years.  It seems like my hair dresser told me about it years ago, but I can’t remember exactly.  At any rate, I’m so glad it’s in my recipe files and it should be in yours too (in my humble opinion).

All you do is take a spice cake mix, mix in one can of pumpkin, and then fold in some chocolate chips.  That’s right . . . no added oil, butter, or eggs!  This makes for a low fat/low calorie cookie.  Bake them up and you’ve got yourself some fluffy, distinctly flavored pumpkin cookies with melted chocolate found throughout.  I think they are as good, if not better, than any Pumpkin Chocolate Chip cookie you can buy in a bakery.  And, that’s kind of a big deal considering that similar cookies found in the bakeries can total anywhere from 175 to 300 calories per cookie!  Oh dear!

Fit Pumpkin Chocolate Chip Cookies || Mimi's Fit Foods

So, if you’re needing a little Autumn treat that won’t break the calorie bank, these are the ticket!  They’re easy to make, super delicious, and much lower in fat and calories than the traditional cookie.  Nobody will ever know they aren’t the “real” thing either.  I’ve taken these to parties, pot-lucks, given them to friends, etc.  They are LOVED by ALL.  And, don’t be afraid to let your toddler help you mix, bake, and eat these cookies.  Mine loved the fun in making them and she DEFINITELY loved the fun in eating them. Happy Autumn!

Fit Pumpkin Chocolate Chip Cookies Toddler Helps | Mimi's Fit Foods

Fit Pumpkin Chocolate Chip Cookies
Mimi’s Fit Foods

Ingredients:
1 spice cake mix (I used Betty Crocker)
1 (15-0z.) can pumpkin puree
1 cup semi-sweet chocolate chips

Directions:
Preheat oven to 350 degrees.

Prepare cookie sheet by lining with parchment paper or silpat liners (you can also spray the bare cookie sheet with cooking spray).

Put cake mix in medium sized mixing bowl. Add pumpkin puree to cake mix and stir until well combined (I do this with a hand mixer on a low speed, but you can use a spoon or other mixer too). Fold in chocolate chips.

Drop by 1 1/2 tablespoons onto prepared cookie sheet (I use a cookie scoop that totals 1 1/2 tablespoons). Leave about an inch between dropped cookies (I usually fit 12 on a cookie sheet).

Bake in preheated oven for 14-17 minutes, or until lightly brown on bottom (mine were perfect at 15 minutes).

Remove cookies to cooling rack to cool completely.

Yields Approximately 40.

Nutritional Information (Per Cookie):
70 Calories | 0.6g Protein | 13.1g Carbs | 2g fat (1.3g = Sat.) | 0.3g Fiber | 7.9g Sugars

Nutritional Information (Per Cookie without Chocolate Chips):
42 Calories | 0.6g Protein | 9.5g Carbs | 0.4g fat (0.3g = Sat.) | 0.3g Fiber | 4.7g Sugars


Advertisement

Cherry-Coconut Greek Frozen Yogurt


Cherry-Coconut Greek Frozen Yogurt | Mimi's Fit Foods
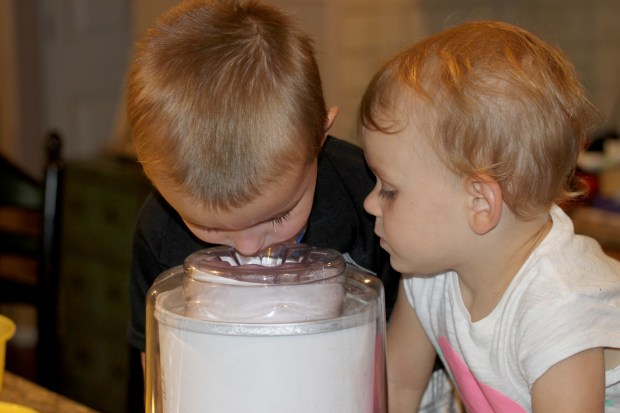
I love sweet cherries.  When the fresh, sweet cherries start to make an appearance in summer I always find something delicious to make with them (in addition to just snacking on them).  This summer I went for frozen yogurt!  I followed a recipe from Cookin’ Canuck, a healthy food blog that I love to follow (you just might want to check her stuff out too!).

Now, I know cherries aren’t everyone’s favorite.  And truthfully, the only reason I know this is because my hubby isn’t the biggest fan.  Before I married him, I couldn’t imagine anyone disliking sweet cherries.  I still kind of think he’s tricking me and that he secretly loves them.  Ha, ha!  After all, he did like this frozen yogurt.  I’m sure the coconut milk had something to do with it.

This recipe only has four easy ingredients.  Cherries, light coconut milk, Greek yogurt, and honey.  You mix it all together, throw it in your ice cream maker, and within no time you have fresh and creamy frozen yogurt.  The blend of the cherries and coconut milk is AWESOME and I love that it’s sweetened with a little bit of honey.

I made this for a family function and cherry lovers and non-cherry lovers all ate their given portions.  Hmmmmm…..A definite win!  I must add that this version of frozen yogurt is extra yummy with Dark Chocolate Magic Shell drizzled over the top.  I mean, cherries and chocolate are one of those pairs that were meant to go together.  Just sayin’!

The hardest part . . . waiting the 25 minutes it took to “freeze” before we could eat it.  Just ask these two cutie pies!

Hard to Wait for Frozen Yogurt | Mimi's Fit Foods

Cherry-Coconut Greek Frozen Yogurt
Mimi’s Fit Foods
Adapted from Cookin’ Canuck

Ingredients:
1 (14 oz) can light coconut milk
1 1/2 cups non-fat plain Greek yogurt
1/4 cup + 3 tbsp honey
3/4 lb. fresh cherries, pitted

Directions:
In a large bowl or measuring pitcher (for easy pouring), whisk together the coconut milk, Greek yogurt and honey. Cover and refrigerate for 1 hour.

Place 3/4 of the pitted cherries in a blender or food processor and blend until almost smooth. Stir the pureed mixture into the yogurt mixture.

Pour the yogurt mixture into an ice cream maker and process according to the manufacturer’s instructions.

Chop the remaining cherries. When the frozen yogurt is almost finished processing, add the chopped cherries to the mixture and finish processing.

Serve immediately or place in the freezer in an airtight container. If you freeze the mixture, warm it at room temperature for about 1 hour before serving.

Serves 8.

Nutritional Information (Per 1/2 Cup Serving):
126.3 Calories | 5g Protein | 19.9g Carbs | 3.3g Fat (3.3g = Sat.) | 0.3g Fiber | 10g Sugars

Dark Chocolate Covered Frozen Banana Bites

Dark Chocolate Covered Frozen Banana Bites | Mimi's Fit Foods

As promised, I’m brining you some delicious and pretty healthy summer treat options using that delicious Homemade Dark Chocolate Magic Shell!  These are seriously so amazingly delicious!  Frozen banana offers such a creamy texture, if blind folded, I wonder if you would honestly think you were eating ice cream.  So, to have it covered in chocolate . . . . yeah, pretty awesome!

These are a cinch to throw together.  All you do is cut up your bananas, freeze them for a bit and then dip them in the Magic Shell.  Since that Magic Shell takes all of about 2 minutes to complete, you can have you a delicious summer treat in no time.

I gotta tell you. . . sometimes I fear dipping stuff in chocolate because it seems like every time I do, it’s a disaster.  The chocolate never sticks, and if it does, it looks like my two-year-old did it.  I was THRILLED when I simply dipped my bananas, pulled them out, and found that they looked absolutely beautiful.

After dipping you can sprinkle them with other toppings if you want.  My little babe is loving sprinkles as of late, so we did some with sprinkles just for fun.  Think of how fun it would be to use sprinkles that are centered around a particular holiday (like red, white and blue for Independence day).  Oh . . . so cute!

While I think these make for a perfect summer treat or snack, don’t be thinking that they wouldn’t be good year-round.  Oh, I’ll be making these quite often . . . regardless of the season.  I’ve been using these babies for a quick fix when I’ve wanted a treat.  You know . . . instead of running out for a triple sundae, or sneaking a full size candy bar, I’ve just popped one of these Banana Bites in my mouth and my treat fix has been cured.  My banana bites are slowly disappearing, but I’m happy to report that my waist size isn’t growing.  LOL!

Go!  Make you some Frozen Banana Bites!  You’ll be glad you did.

Dark Chocolate Frozen Banana Bites
Mimi’s Fit Foods
Adapted From Gimme Some Oven

Ingredients:
3 medium ripe (but not soggy) bananas
1 batch Homemade Dark Chocolate Magic Shell (follow link in blog post)
popsicle sticks
sprinkles, optional

Directions:
Cut the bananas into six equal bite-sized pieces. Place on a foil- or parchment-covered baking sheet. Then poke them with the popsicle sticks. Freeze for at least 2 hours or until frozen.

Remove and dip each banana in the magic shell until covered. (I used a tall jar . . . the one pictured in the Magic Shell post . . . so that it would be easier to dip.) Sprinkle with sprinkles, if desired, and place back on cold baking sheet until dried.

Serve immediately or re-freeze.

Yields 18.

Nutritional Information (Per Banana Bite):
92.6 Calories | 0.2g Protein | 12.4g Carbs | 5.5g Fat (4g = Sat.) | 1.5g Fiber | 8.6g Sugars

Homemade Dark Chocolate Magic Shell

Homemade Dark Chocolate Magic Shell | Mimi's Fit Foods

Here’s a sweet, little indulgence you may want to add to your recipe box.  It’s made with dark chocolate chips (and we’ve all heard how healthy dark chocolate is, right!?) and coconut oil.  That’s it.  It’s dangerously easy to make and it adds just a little special touch to your frozen treats (you know . . . frozen yogurt or frozen fruit).

When my parents bought Magic Shell when I was a kid, I thought it was the cat’s meow!  I was so fascinated with how it would harden up when poured over my ice cream.  I loved the stuff.  This homemade version does EXACTLY that, but it tastes WAY better.  I also love that I was able to make it with dark chocolate.

Stay tuned . . . I have a couple “healthy” summer treats headed your way where I’ll put this Homemade Dark Chocolate Magic Shell to good use.

Homemade Dark Chocolate Magic Shell
Mimi’s Fit Foods
Adapted from Gimme Some Oven

Ingredients:
1 cup dark chocolate chips (mine were 63% cacao – brand was E Guittard)
2 tablespoons virgin organic coconut oil

Directions:
Stir together chocolate chips and coconut oil in a large microwave-safe bowl. Place in microwave and cook on high for 30 seconds. Remove and stir. Continue microwaving and stirring in 15 second intervals until all of the chocolate is melted. Remove and let sit until the chocolate reaches room temperature.
Serve with ice cream or fruit. Can be covered and stored at room temperature (not in a refrigerator) for up to 1 month.

Serves 11.

Nutritional Information (Per Serving = 1 Tablespoon):
123 Calories | 0g Protein | 13g Carbs | 9g Fat (6.6g = Sat.) | 1.5g Fiber | 10.2g Sugar

Guiltless Fudge Cookies

Guiltless Fudge Cookies|Mimi's Fit Foods

These cookies are oh-so-good!  They have a nice, crisp exterior, but have a soft and fudgey center.  It took all I had to not eat the entire batch!

These are made without butter or eggs and I mixed them up in one bowl (my food processor actually).  The cookie dough ends up being really thick.  I first tried to mix it in a mixing bowl with a spoon, but was having a hard time pulling the dough together the way I wanted.  So, I dumped it all in my food processor, gave it a few pulses, and the dough came together quickly and perfectly!  It was so easy to scoop onto the baking sheet.

We’ve been eating pretty darn clean around our house and we were just itching to have a sweet treat.  I’ve had these on my mind, and with them being healthier than a traditional cookie, I whipped them up.  These certainly took care of our sweet tooth without breaking the calorie bank.

That being said, the cookies are SO good that you might not believe they are as low-cal as they are.  These are sinfully chocolatey.  They are a chocolate-lover’s dream.  Next time you’re craving chocolate or something sweet . . . give these a try instead of the typical full fat cookie.  I can about guarantee you won’t be disappointed!

Guiltless Fudge Cookies | Mimi's Fit Foods

Guiltless Fudge Cookies
Adapted from Taste, Love & Nourish

1/2 cup whole wheat flour
1/2 cup all purpose flour
1/4 cup unsweetened cocoa powder
1/4 teaspoon baking soda
1/4 teaspoon salt
1/2 cup granulated sugar
1/4 cup brown sugar, packed
5 tablespoons melted coconut oil
1/3 cup plain nonfat Greek yogurt
1 teaspoon pure vanilla extract

Preheat your oven to 350 degrees. Line a baking sheet with parchment paper or a Silpat liner.

In the bowl of your food processor add the flour, cocoa powder, baking soda and salt, sugar and brown sugar. Pulse a few times to combine.  Add the coconut oil, yogurt and vanilla extract. Pulse a few times until the dough comes together.  (Alternatively, you can do this all in a bowl.  You would whisk the dry ingredients to combine and then add the wet ingredients to the dry.  Using a sturdy spoon, stir to combine the wet and dry ingredients, but do not overwork it.)

Drop level tablespoonfuls about 2 inches apart onto the baking sheet and bake for 10 minutes or until the edges just begin to set.

Cool on the pans for about a minute, then transfer to a wire rack to cool completely.

Makes 24 cookies if dropped by level tablespoons.
Makes 16 cookies if dropped by a 1 1/2 tablespoon cookie scoop.

Nutritional Information Per Cookie (Based on yield of 24)
Calories:  71.8
Protein:  1.1g
Carbs:  11.7g
Fat:  3.1g (2.7g = Sat.)
Fiber:  0.7g
Sugars:  7.4g

Coconut Infused Vanilla Muffins

Coconut Infused Vanilla Muffins - Mimi's Fit Foods

These are glorious!  They are soft, fluffy, and contain both hints of coconut and vanilla.  The dusting of cinnamon on top adds the perfect finishing touch.

And . . . well, if you’re looking to use up some of that leftover coconut milk that’s lingering in your fridge, this recipe is a fabulous idea!   (It seems like most recipes that call for coconut milk rarely use the entire can!)

We are BIG fans of coconut oil and coconut flavor in my house.  So, I was pretty darn sure we were going to LOVE these muffins.  That being said, the coconut is not overwhelming here, but offers nice subtle notes that leave you completely satisfied.  I use organic extra virgin coconut oil because it has a stronger coconut flavor and it’s a tad bit better for you than other forms of coconut oil.  (If you’re looking for less coconut flavor, then use one that’s not organic and not extra virgin . . . but please make sure it’s non-hydrogenated as you’ll still want the health benefits of using the coconut oil.)

Now, let me just clarify that these muffins are not perfect from a nutritional stand point.  However, they are healthier than most traditional muffins.  They have less sugar, use a healthier fat, and more than half of the flour is whole wheat.  I realize we are all at different places in our health journeys.  For some, these could be the healthiest muffins you’ve made in years.  For others, these might be considered a treat/dessert.  Either way, I think these can find a way into the hearts of many of you, and luckily they are much more heart-healthy than the typical muffin (or donut, or pop-tart, or other crazy breakfast option you might grab).

Coconut Infused Vanilla Muffins
Adapted from Mel’s Kitchen Cafe

2 large eggs
1/2 cup canned light coconut milk
1/2 cup lowfat buttermilk
1 1/2 teaspoons vanilla extract
1/2 teaspoon coconut extract
6 tablespoons coconut oil, melted
1 1/4 cups white whole wheat flour
1 cup unbleached all-purpose flour
2 teaspoons baking powder
3/4 teaspoon salt
1/2 cup plus 2 tablespoons sugar
Cinnamon and sugar for dusting

Preheat the oven to 350 degrees and lightly grease a 12-cup muffin tin with nonstick cooking spray (or you can line them with paper liners).

In a medium bowl, whisk together the eggs, milks, vanilla extract, coconut extract and coconut oil.

In a large bowl, whisk together the whole wheat flour, all-purpose flour, baking powder, salt and sugar. Make a well in the center of the dry ingredients and pour in the wet ingredients.

Using a wooden spoon or rubber spatula, stir the batter together until just combined. Don’t over mix or the muffins will be tough and dry. It only takes a few stirs to incorporate the batter well enough. The batter will be lumpy and that is ok.

Divide the batter evenly among the prepared muffin tin. Sprinkle lightly with cinnamon and sugar.

Bake for 16-20 minutes until a toothpick inserted into the center of a muffin comes out dry or with a few moist crumbs. Don’t over bake.

Serve warm or at room temperature.

Serves 12.

Nutritional Information (Per Serving = 1 Muffin)
Calories:  205.4
Protein:  4.1g
Carbs:  28.6g
Fat:  8.8g (7g = Sat.)
Fiber:  1.8g
Sugars:  11.3g

Grilled Peaches With a Raspberry-Lime Marinade

Grilled Peaches With a Raspberry-Lime Marinade - Mimi's Fit Foods

Have you ever had grilled peaches before?  They are delicious and make such a sweet little dessert without loads of calories.  We have them every fall when the peaches are in season.  I tried this new variation of them and they turned out so awesome.  The peaches get to take a 30-60 minute soak in a flavorful marinade made up of brown sugar, lime juice, and raspberries.  Holy moly!  So good, right!?  This marinade just adds an extra fabulous layer of taste to the grilled peaches and we were all smitten at our house.

The grilled peaches are delicious plain (well, topped with a little extra marinade, of course) . . . especially if you’re using them for a side dish.  If you want to take them to an extra dessert-ish level, you can add ice cream.  We totally did this (because, why not!?) and we chose to top our peaches with Dryer’s Slow Churned Frozen Vanilla Yogurt.  YUM!

Grilled Peaches With a Raspberry-Lime Marinade Frozen Yogurt - Mimi's Fit Foods

Grilled Peaches With a Raspberry-Lime Marinade
Adapted from sparkrecipes.com

2 tablespoons brown sugar
2 tablespoons fresh lime juice (usually 1 lime)
1 cup fresh raspberries
5 medium unpeeled peaches, halved and pitted
(vegetable oil to coat the grill)

Comine sugar and lime juice in a shallow dish; mix well.  Add 1/2 of the raspberries and mash.

Add peach halves, turning to coat and marinate at room temperature, cut sides down for 30-60 minutes.

Clean and pre-heat grill to a medium-high heat.  Coat grill rack with oil and place peaches cut sides down (save marinade).  Turn peaches over after two minutes, reduce heat to low-medium, then cook for another 15 minutes or until tender, basting once with half of the reserved marinade.  Remove from grill.

Stir remaining raspberries into reserved marinade and spoon over peach halves.  Serve warm (and top with your choice of ice cream, if desired).

Serves 5.

Nutritional Information (Per Serving = 2 Peach Halves)
Calories:  75.8
Protein:  1g
Carbs:  21.7g
Fat:  0.2g (0g = Sat)
Fiber:  3.7g
Sugars:  7.5g

Nutritional Information
(Per Serving = 2 Peach Halves + 1/4 Cup Dryer’s SC Frozen Yogurt )
Calories:  125.8
Protein:  2g
Carbs:  30.2g
Fat:  1.7g (0g = Sat.)
Fiber:  3.7g
Sugars:  7.5g

Baby’s First Birthday Cake

Baby's 1st Birthday Cake-Mimi's Fit Foods

Okay guys!  I’m just going to do one more post related to my baby’s birthday and then I’ll get back to all the other healthy recipes.  I debated on whether I should share this, but as my little baby’s birthday approached I desperately wanted to make her something that was healthy, but still yummy.  I mean, I wanted her to dig in and go back for more (and more and more).    I figured that there might be some moms out there that are (or will be) in the same boat, so I’m sharing a baby recipe for all you moms out there.

This cake is seriously a keeper!  The great part about it, besides that it actually tastes good, is that it is made with whole wheat flour and has no sugar.  It’s sweetened with apple juice and applesauce.  The outcome tastes a lot like a healthy carrot muffin.  It’s TOTALLY edible.  Beau and I have secretly been eating the leftovers for breakfast (I guess it’s no secret anymore . . . ha, ha!).  My little baby doll has been eating the leftovers after her lunch most days.  In fact, she saw me take it out of the fridge to take a picture of it and totally cried when I put it away without giving her some.  So, her wish was granted and she got to eat her leftover cake for lunch AND dinner (and, I may have had a little bite right along with her)!

And, if that doesn’t convince you that she liked it, maybe this will!

Baby's First Birthday Cake Eat-Mimi's Fit Foods

It is baked in a 9×9 pan.  This gives you the liberty to assemble it as you wish.  I decided I wanted to make a layered cake, so I cut the finished cake in half, and then I trimmed it down to two small-ish rectangles.  I put a layer of frosting between my two rectangles/layers, frosted the entire outside, and topped it with strawberries (she LOVES strawberries and that was also the theme of her birthday party).  That all being said, you can simply cut a small piece and frost that.  Or, you can frost the entire 9×9 cake just as it is.  Or, you can get as creative as you want in any other way.

So, if you’re kind of like me and you’re trying to spare your baby from sugar as long as possible and you like to make your own baby food (I try to make my own as much as possible because I know EXACTLY what is in it . . . and it tastes way better), add this baby cake to your files.  You’ll be pleased with the tasty results as well as the pleasure your baby will get from it.

As I quick little side note:  If you haven’t introduced your baby to egg whites and wheat yet, you may want to check with your doctor to verify if it’s okay to feed this cake to your baby.  If it’s not, then you might want to save this recipe for the second birthday (or another occasion).  This is more of a precaution for allergies and such.  I will say that I didn’t get my doctor’s “official” verification, but I had tried eggs and wheat on my baby before her birthday and she didn’t show any signs of an allergic reaction.  Thus, this cake treated her just fine.

Baby’s First Birthday Cake
Adapted from “What To Expect The First Year”

1 1/4 cups shredded carrots
1 1/4 cups apple juice concentrate
1 cup dried cranberries
1 cup whole wheat flour
1/4 cup wheat germ (found near the hot cereal in grocer store)
1 tablespoon baking powder
1 1/2 teaspoons ground cinnamon
2 tablespoons canola oil
1 whole egg
2 egg whites
1 1/2 teaspoons vanilla extract
1/3 cup unsweetened applesauce
Baby’s Cream Cheese Frosting (recipe follows)

Preheat the oven to 350 degrees.  Line a 9×9 cake pan with parchment paper and spray the paper with cooking spray.  Set aside.

Combine the carrots with 1/2 cup plus 1 tablespoon of the juice concentrate in a medium-size saucepan.  Bring to a boil over high heat, then lower the heat to medium and simmer, covered, until the carrots are tender, about 15 minutes.  Transfer the carrot mixture to a blender or food processor and puree until smooth.  Add the dried cranberries and process until finely chopped.  Set the mixture aside to cool.

Combine the flour, wheat germ, baking powder, and cinnamon in a large mixing bowl.  Add 1/2 cup plus 3 tablespoons of the remaining juice concentrate, oil, whole egg, egg whites, and vanilla and beat just until well mixed.  Fold in the carrot puree and applesauce.  Pour batter into prepared cake pan, smoothing out the top with a rubber spatula.

Bake until a knife inserted in the center of the cake comes out clean, 25 to 40 minutes.  Place on wire rack and let cool briefly in the pan, then turn out onto the rack to cool completely.

When cool, frost as desired with the Cream Cheese Frosting (see recipe below).

Store any leftovers, loosely covered, in the refrigerator for up to 2 days.

Baby’s Cream Cheese Frosting
Adapted from “What To Expect The First Year”

4 tablespoons apple juice concentrate
8 ounces cream cheese, at room temperature
1 teaspoon vanilla extract
1/4 cup dried cranberries
3/4 teaspoon unflavored gelatin

Set aside 1 tablespoon of the juice concentrate.  Process the remaining juice concentrate, cream cheese, vanilla, and dried cranberries in a blender or food processor until smooth.  Transfer to a mixing bowl.  Set aside.

Stir the gelatin into the reserved tablespoon of juice concentrate in a small saucepan; let stand to soften, 1 minute.  Then, heat to boiling over medium heat, stirring to dissolve the gelatin.

Beat the gelatin mixture into the cream cheese mixture until well blended.  Cover and refrigerate just until the frosting begins to set, 30 to 60 minutes.  Then frost the cake as desired.

Makes enough to frost one 9-inch-square cake.

Lighter Cake Pops

Lighter Cake Pops - Mimi's Fit Foods

Who would have thought I would have put a post on this blog for something like Cake Pops?  Well, here’s the thing.  My sweet, baby girl just had her first birthday.  (Where on earth does the time go!?)  So, I made these cake pops for her birthday party and they were loved by all.  I share these with you because they  are a slightly healthier version than the more popular one.  With theses, you don’t make a cake, crumble it, add that fattening, sugary cream cheese frosting and then roll them into balls.  Instead, you make a light cake batter (which has no oil or yolk in it . . . brilliant!) and actually bake the batter into balls.  This saves a ton of calories and they are still super delicious!  Keep in mind that they are still dipped in white chocolate which can add up if you eat a lot of these babies (there’s not really a great way to save calories on this step).

I snagged the recipe and idea from Gina’s Skinny Recipes.  I didn’t alter it one bit and they turned out perfectly (she has fabulous step-by-step pictures if you want to click on the link).  In order to bake these pops, you’ll need a cake pop baking pan.  I followed Gina’s advice and bought one from Target.  It turned out some beautiful, golden cake pops . . . just like she said.  She also has 48 ounces of white chocolate listed in her recipe, although you’ll never use all of that to coat your cake pops.  She mentioned this and found that she actually only used about 20 ounces of it (which is what is used to calculate the nutritional information).  That being said, I still opted to melt more than 20 ounces so that there would be room to actually dip the cake pop in the bowl/cup.

So, if you have a special occasion where you might want to make something that is sweet, trendy, and cute . . . without loading too many extra calories, I think these are a great idea.  I mean, I obviously think so because I made them for my baby’s birthday party.

I can’t believe she’s 1 year old already!  While the cake pops are delicious, I think I’ll take an extra snuggle with my darling girlie before I have one more cake pop.  She melts my heart (way more than any cake pop . . . or any treat for that matter ) ever could.

www.mimisfitfoods.com

Lighter/Skinny Cake Pops
Recipe Source:  Gina’s Skinny Recipes

1 (16.5-ounce) packaged cake mix (I used white, Gina used yellow)
6 ounces plain fat-free Greek yogurt (I used Oikos)
1 cup water
2 large egg whites
1 teaspoon vanilla extract
baking spray
48 ounces Baker’s white chocolate (20 oz. calculated in n.i.)
sprinkles (optional)
48 lollipop sticks (I used paper straws)
styrofoam block

Preheat oven to 350 degrees.  Lightly spray the cake pop pan with baking spray.

Combine all the cake ingredients in a large mixing bowl and beat until combined.Place the batter into a pastry bag or large ziplock bag with the tip cut off.

Pipe the batter into the prepared cake pop pan and bake about 18 minutes (I rotated the pan after 10 minutes to be sure they baked evenly). Let it rest 5 minutes before opening the pan.

Place cake balls on a wire rack and repeat with remaining batter. Using a scissor, cutthe seam off the balls.

Refrigerate the cake balls for about 45 minutes, this helps the chocolate stick to the cake.

Melt some of the chocolate in the microwave according to package directions, careful not to burn the chocolate. Insert the tip of the stick into the melted chocolate, then into the cake ball (this helps hold the stick in place).

In batches, melt remaining chocolate. Dip the cake pops into the chocolate, let the excess drip off then place stick on a styrofoam block about a minute, then add sprinkles on top if using.

Makes 48-50 balls.

Nutritional Information (Per Cake Pop)
Calories:  102.5
Protein:  1.4g
Carbs:  15g
Fat:  4g
Fiber:  0g
Sugars:  7g

Fit Granola

Oats, Almond, & Coconut Granola - Low Fat and Low Calorie

Oh, granola!  Most of us LOVE granola! Maybe that’s because granola is made with so many sweet coatings we can’t help but love it.  Unfortunately, all of those sweet coatings (honey, syrup, etc.) really help add up calories and sugars.  I can tell you that it is pretty dang hard to find ANY type of granola where the calories aren’t a bit high for the amount you can eat in a serving.  That being said . . . I knew I had to figure out how to make a granola that still had a delicious taste, but with fewer calories.

This granola is AWESOME!  Of course, the original version tastes even more awesome . . . but, I prefer this one for the fewer calories.  I was able to make a substantial reduction without sacrificing much of the flavor.  My cute husband started munching on this batch of granola and ended up telling me to put it away because it was so addicting and good.  It had a nice maple and brown sugar taste and the toasted oats, coconut, and almonds make it that much more delicious.  Oh, and the house smells incredible while it’s baking!

This stuff is DELICIOUS!  I’m warning you now . . . if you don’t have self control, then making this could ruin your diet.  It really is hard to stop eating once you start.  It’s that good!  (And, if you can afford extra calories, I love stirring in come raisins or dried cranberries.  Yum!)

Fit Granola
Adapted from Mel’s Kitchen Café

3 cups old-fashioned rolled oats
1 cup slivered almonds
3/4 cup shredded sweetened coconut
1/4 cup brown sugar
6 tablespoons sugar-free maple syrup
1 tablespoon molasses
3 tablespoons canola oil
3/4 teaspoon salt

Preheat oven to 250 degrees.  In a large bowl, combine the oats, almonds, coconut, and brown sugar.  In a separate bowl or liquid measuring cup, combine maple syrup, oil and salt.  Combine both mixtures by slowly pouring the liquid over the oatmeal mixture and stirring well.  Divide in half and pour onto two 11×17-inch rimmed baking sheets, spreading out into an even layer on each sheet.  Cook for 1 hour and 10 minutes, or until golden.  Remove from the oven, cool slightly, and then transfer into a large bowl, slightly breaking up the clumps.

Make about 7 Cups of Granola.

Nutritional Information (Per Serving = 1/3 Cup)
Calories:  134.9
Protein:  2.9g
Carbs:  15.8g
Fat:  7.8g
Fiber:  2.2g
Sugar:  6.1g