FIt Mexican Stack

Fit Mexican Stack || Mimi's Fit Foods

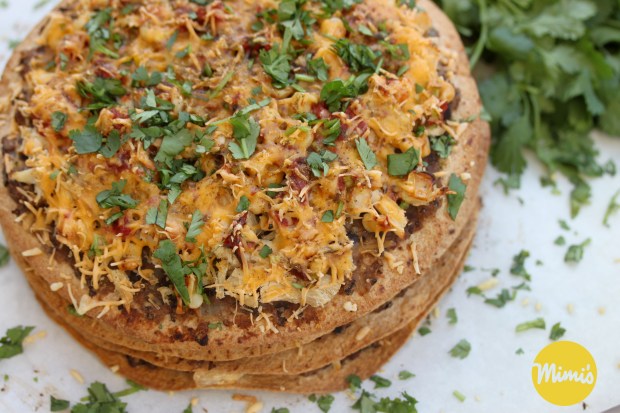
OMG!  I seriously cannot believe that I haven’t blogged this yet.   I mean, I kind of can.  Mostly because whenever I make it we NEVER want to wait for me to snap photos of it before we eat.  Lucky for you all, the hubby and the baby were outside when this came out of the oven so I hurried as fast as I could to snap some photos before we gobbled it up.

Fit Mexican Stack | Mimi's Fit Foods

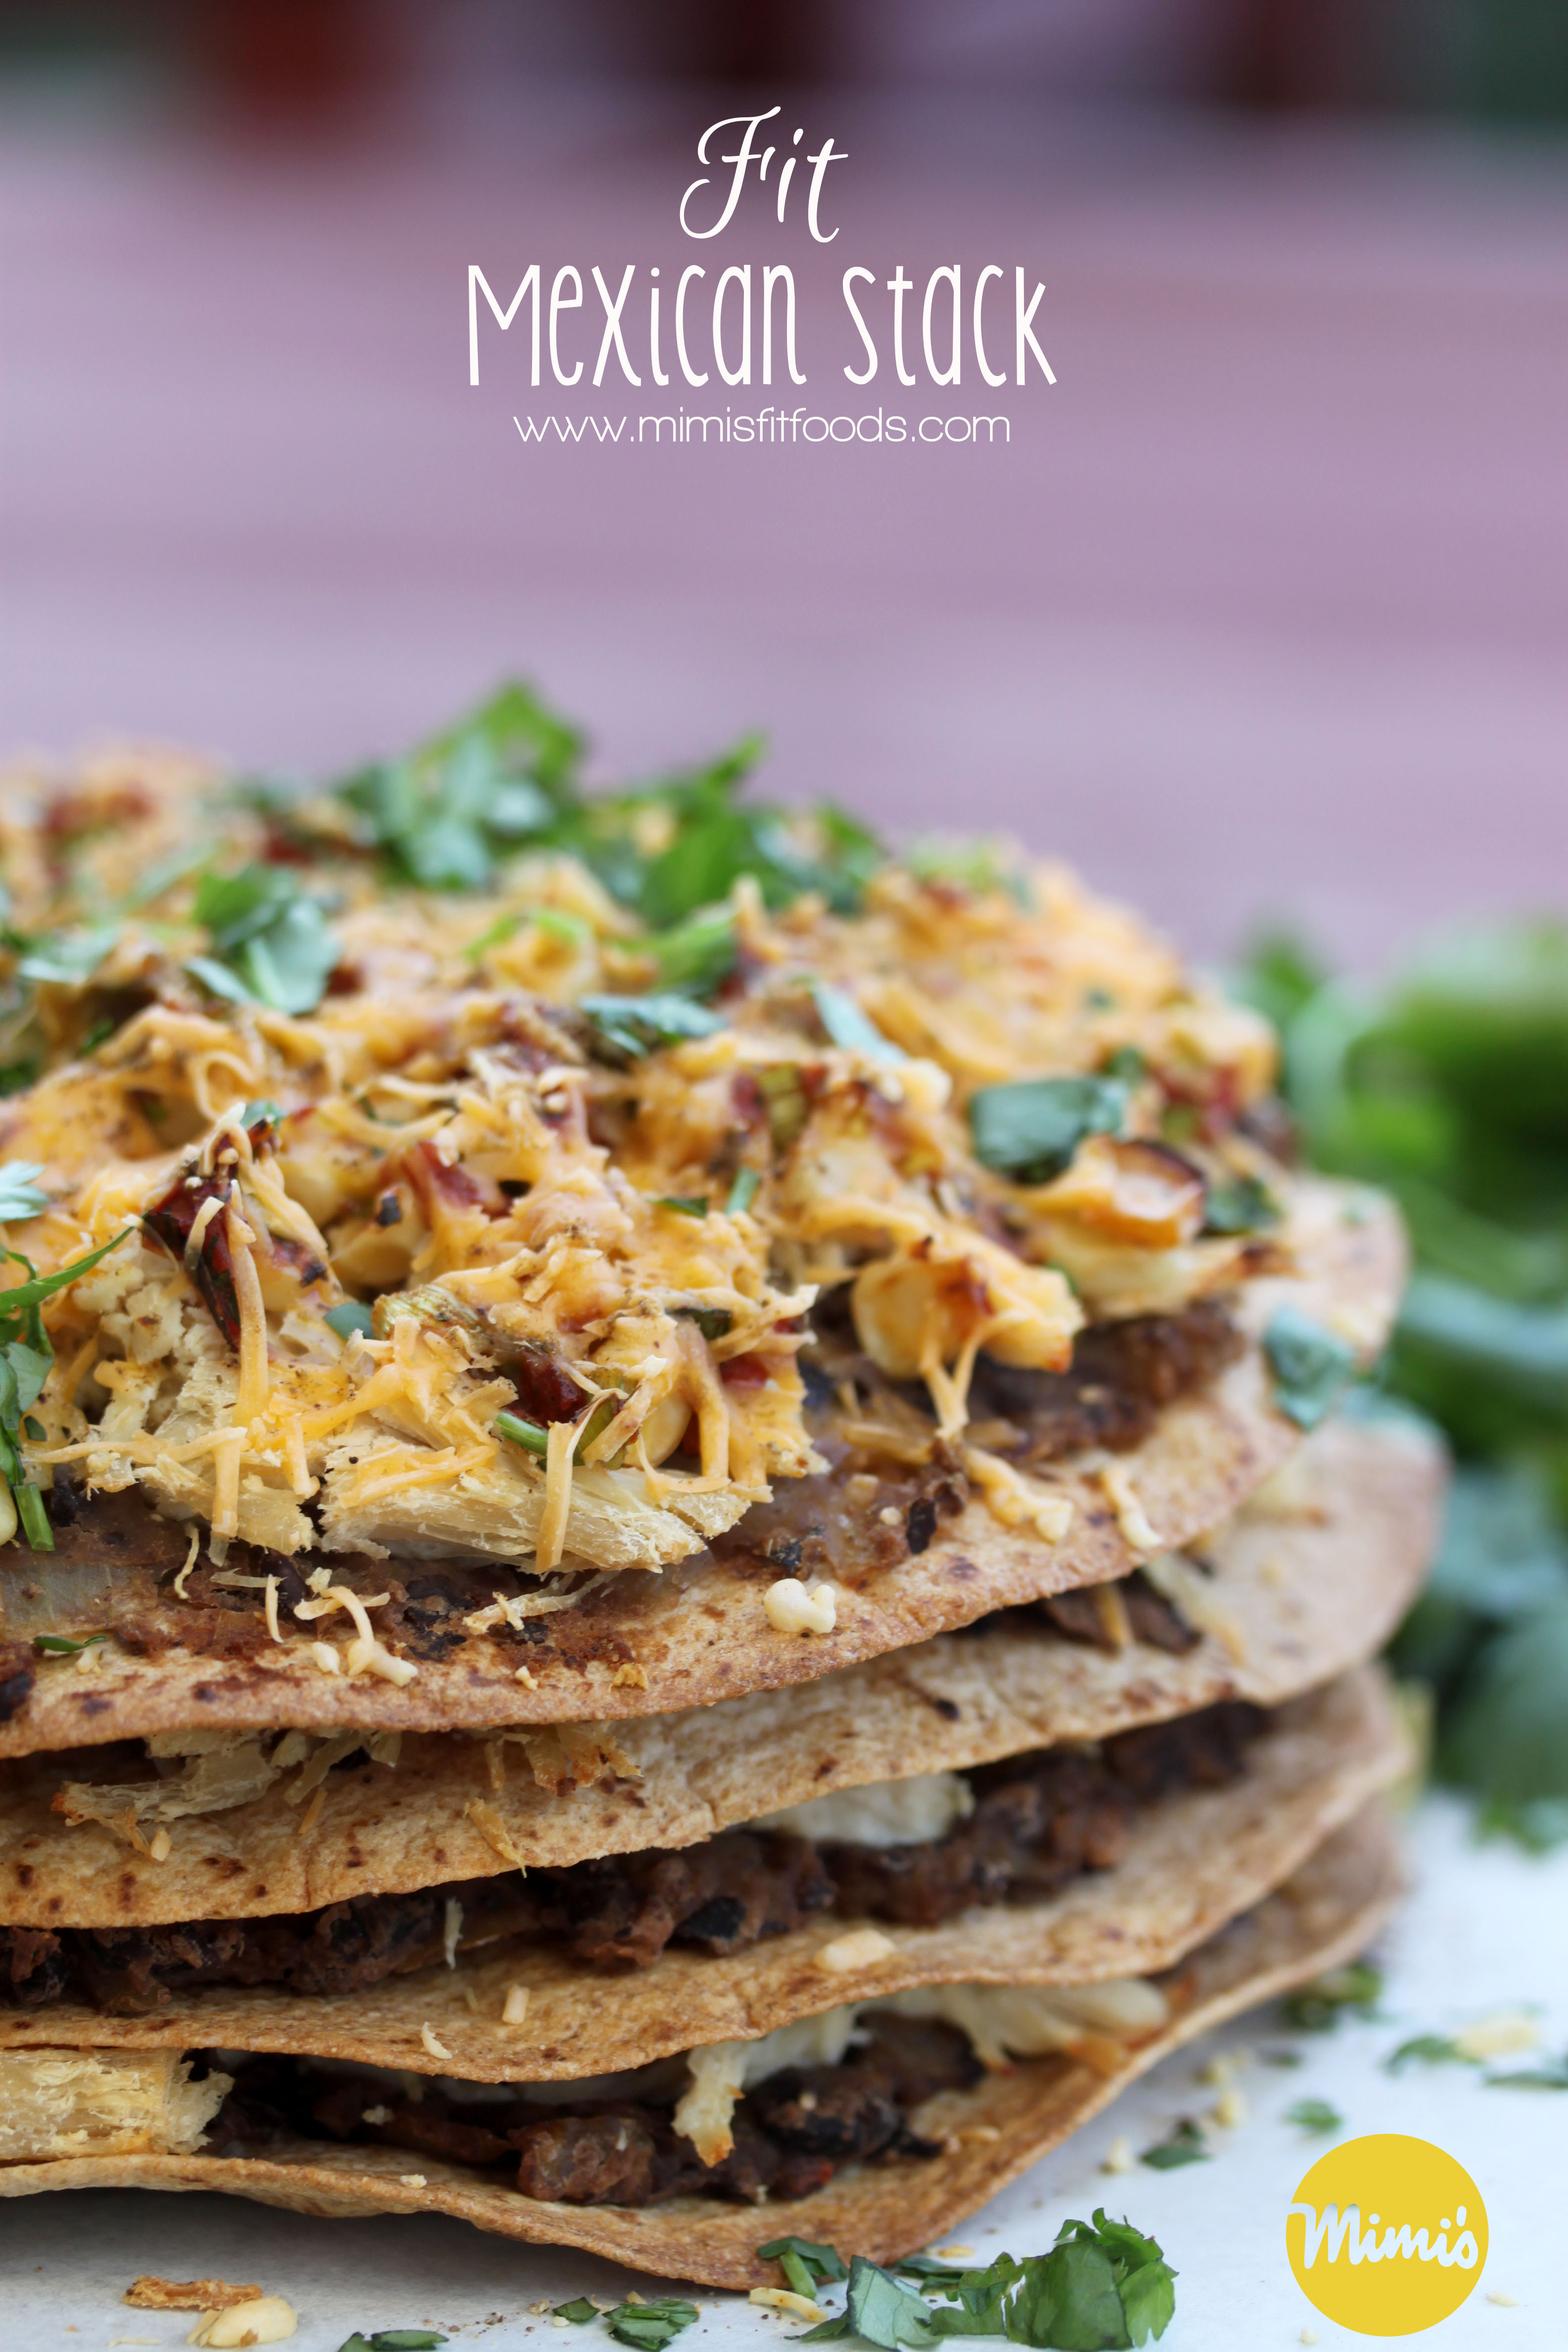
I’ve been making it for years.  It’s a family favorite.  It’s got all those classic Mexican flavors, but it’s oh-so-fun with the way it is layered and the layers definitely add some great texture.  I adapted the recipe from America’s Test Kitchen. That should already sell you on the deliciousness, but let me just give you a few highlights.  Pretoasting the tortillas makes this dish a winner.  When they’ve been crisped up, they not only taste great, but they provide the necessary structure for the stack.  The toasted tortillas also help us to avoid that raw flavor and gummy texture that soggy tortillas can leave behind  So, the toasted tortillas are definitely a huge highlight.  Another huge highlight is the great amount of  filling you find between layers.  You will NOT feel short-changed here, folks. And, if I can, I must also highlight the mashed black beans.  I simply love them!

Fit Mexican Stack - Mimi's Fit Foods

So, what I’m saying here is that you should really make this because I’m pretty sure you’re going to find that it will become one of your family favorites too.  It’s a winner, hands down!

Fit Mexican Stack
Mimi’s Fit Foods
Adapted from The America’s Test Kitchen Healthy Family Cookbook

Ingredients:
2 teaspoons canola oil
1 cup frozen corn, thawed
8 ounces plum tomatoes (2 to 3), cored and chopped medium
4 green onions, sliced thin
1 teaspoon fresh lime juice
2 tablespoons minced fresh cilantro
salt and pepper
1 onion, minced
3 garlic cloves, minced
1 jalapeño pepper, stemmed, seeded, and minced
1 teaspoon ground cumin
1 (15-ounce) can black beans, rinsed
3/4 cup low-sodium chicken broth
12 ounces cooked and shredded chicken breast
4 (10-inch) whole-wheat flour tortillas
vegetable oil spray
3/4 cup shredded 50% light cheddar cheese (about 3 ounces)

Directions:
Heat 1 teaspoon of the oil in a 12-inch nonstick skillet over medium-high heat until shimmering. Add the corn and cook until golden, about 4 minutes. Transfer the corn to a large bowl, stir in the tomatoes, green onions, lime juice, and 1 tablespoon of the cilantro and season with salt and pepper to taste.

Wipe the skillet clean with paper towels, add the remaining teaspoon of oil, and heat over medium heat until shimmering. Add the onion and cook until softened, 3 to 5 minutes. Stir in the garlic, jalapeño, and cumin and cook until fragrant, about 30 seconds.

Stir in the black beans and the chicken broth and cook until the liquid has nearly evaporated, 4 to 6 minutes. Transfer the mixture to a large bowl and mash the beans with a potato masher until no beans are left whole. Season with salt and pepper to taste.

Meanwhile, heat the oven to 400 degrees. Lightly spray both sides of half the tortillas with vegetable oil spray and lay on a baking sheet.

Bake the tortillas until lightly browned on both sides, 8 to 10 minutes, flipping them half-way through the baking. Remove the tortillas from the oven and repeat with the remaining tortillas.

Line a rimless or inverted baking sheet with parchment paper. Place one of the toasted tortillas on the prepared baking sheet. Spread one-quarter of the mashed beans over the top, leaving a 1/2-inch border at the edge. Sprinkle with one-quarter of the corn mixture, one-quarter of the chicken, and 3 tablespoons cheddar. Repeat with the remaining tortillas, beans, corn, chicken, and cheddar and stack the topped tortillas to make a layered stack.

Bake the Mexican Stack until the cheese is melted and slightly brown, 20-25 minutes. Let the stack cool on the baking sheet for 5 minutes, then slide it onto a cutting board using the parchment. Remove the parchment and sprinkle with the remaining tablespoon cilantro. Cut into 8 wedges and serve hot.

Serves 8.

Nutritional Information (Per Serving = 1 Slice):
210.7 Calories | 21.1g Protein | 25.6g Carbs | 6g (1.6g = Sat.) Fat | 10.2g Fiber | 2.3g Sugars

Advertisement

Cherry-Coconut Greek Frozen Yogurt


Cherry-Coconut Greek Frozen Yogurt | Mimi's Fit FoodsI love sweet cherries.  When the fresh, sweet cherries start to make an appearance in summer I always find something delicious to make with them (in addition to just snacking on them).  This summer I went for frozen yogurt!  I followed a recipe from Cookin’ Canuck, a healthy food blog that I love to follow (you just might want to check her stuff out too!).

Now, I know cherries aren’t everyone’s favorite.  And truthfully, the only reason I know this is because my hubby isn’t the biggest fan.  Before I married him, I couldn’t imagine anyone disliking sweet cherries.  I still kind of think he’s tricking me and that he secretly loves them.  Ha, ha!  After all, he did like this frozen yogurt.  I’m sure the coconut milk had something to do with it.

This recipe only has four easy ingredients.  Cherries, light coconut milk, Greek yogurt, and honey.  You mix it all together, throw it in your ice cream maker, and within no time you have fresh and creamy frozen yogurt.  The blend of the cherries and coconut milk is AWESOME and I love that it’s sweetened with a little bit of honey.

I made this for a family function and cherry lovers and non-cherry lovers all ate their given portions.  Hmmmmm…..A definite win!  I must add that this version of frozen yogurt is extra yummy with Dark Chocolate Magic Shell drizzled over the top.  I mean, cherries and chocolate are one of those pairs that were meant to go together.  Just sayin’!

The hardest part . . . waiting the 25 minutes it took to “freeze” before we could eat it.  Just ask these two cutie pies!

Hard to Wait for Frozen Yogurt | Mimi's Fit Foods

Cherry-Coconut Greek Frozen Yogurt
Mimi’s Fit Foods
Adapted from Cookin’ Canuck

Ingredients:
1 (14 oz) can light coconut milk
1 1/2 cups non-fat plain Greek yogurt
1/4 cup + 3 tbsp honey
3/4 lb. fresh cherries, pitted

Directions:
In a large bowl or measuring pitcher (for easy pouring), whisk together the coconut milk, Greek yogurt and honey. Cover and refrigerate for 1 hour.

Place 3/4 of the pitted cherries in a blender or food processor and blend until almost smooth. Stir the pureed mixture into the yogurt mixture.

Pour the yogurt mixture into an ice cream maker and process according to the manufacturer’s instructions.

Chop the remaining cherries. When the frozen yogurt is almost finished processing, add the chopped cherries to the mixture and finish processing.

Serve immediately or place in the freezer in an airtight container. If you freeze the mixture, warm it at room temperature for about 1 hour before serving.

Serves 8.

Nutritional Information (Per 1/2 Cup Serving):
126.3 Calories | 5g Protein | 19.9g Carbs | 3.3g Fat (3.3g = Sat.) | 0.3g Fiber | 10g Sugars

Dark Chocolate Covered Frozen Banana Bites

Dark Chocolate Covered Frozen Banana Bites | Mimi's Fit Foods

As promised, I’m brining you some delicious and pretty healthy summer treat options using that delicious Homemade Dark Chocolate Magic Shell!  These are seriously so amazingly delicious!  Frozen banana offers such a creamy texture, if blind folded, I wonder if you would honestly think you were eating ice cream.  So, to have it covered in chocolate . . . . yeah, pretty awesome!

These are a cinch to throw together.  All you do is cut up your bananas, freeze them for a bit and then dip them in the Magic Shell.  Since that Magic Shell takes all of about 2 minutes to complete, you can have you a delicious summer treat in no time.

I gotta tell you. . . sometimes I fear dipping stuff in chocolate because it seems like every time I do, it’s a disaster.  The chocolate never sticks, and if it does, it looks like my two-year-old did it.  I was THRILLED when I simply dipped my bananas, pulled them out, and found that they looked absolutely beautiful.

After dipping you can sprinkle them with other toppings if you want.  My little babe is loving sprinkles as of late, so we did some with sprinkles just for fun.  Think of how fun it would be to use sprinkles that are centered around a particular holiday (like red, white and blue for Independence day).  Oh . . . so cute!

While I think these make for a perfect summer treat or snack, don’t be thinking that they wouldn’t be good year-round.  Oh, I’ll be making these quite often . . . regardless of the season.  I’ve been using these babies for a quick fix when I’ve wanted a treat.  You know . . . instead of running out for a triple sundae, or sneaking a full size candy bar, I’ve just popped one of these Banana Bites in my mouth and my treat fix has been cured.  My banana bites are slowly disappearing, but I’m happy to report that my waist size isn’t growing.  LOL!

Go!  Make you some Frozen Banana Bites!  You’ll be glad you did.

Dark Chocolate Frozen Banana Bites
Mimi’s Fit Foods
Adapted From Gimme Some Oven

Ingredients:
3 medium ripe (but not soggy) bananas
1 batch Homemade Dark Chocolate Magic Shell (follow link in blog post)
popsicle sticks
sprinkles, optional

Directions:
Cut the bananas into six equal bite-sized pieces. Place on a foil- or parchment-covered baking sheet. Then poke them with the popsicle sticks. Freeze for at least 2 hours or until frozen.

Remove and dip each banana in the magic shell until covered. (I used a tall jar . . . the one pictured in the Magic Shell post . . . so that it would be easier to dip.) Sprinkle with sprinkles, if desired, and place back on cold baking sheet until dried.

Serve immediately or re-freeze.

Yields 18.

Nutritional Information (Per Banana Bite):
92.6 Calories | 0.2g Protein | 12.4g Carbs | 5.5g Fat (4g = Sat.) | 1.5g Fiber | 8.6g Sugars

Homemade Dark Chocolate Magic Shell

Homemade Dark Chocolate Magic Shell | Mimi's Fit Foods

Here’s a sweet, little indulgence you may want to add to your recipe box.  It’s made with dark chocolate chips (and we’ve all heard how healthy dark chocolate is, right!?) and coconut oil.  That’s it.  It’s dangerously easy to make and it adds just a little special touch to your frozen treats (you know . . . frozen yogurt or frozen fruit).

When my parents bought Magic Shell when I was a kid, I thought it was the cat’s meow!  I was so fascinated with how it would harden up when poured over my ice cream.  I loved the stuff.  This homemade version does EXACTLY that, but it tastes WAY better.  I also love that I was able to make it with dark chocolate.

Stay tuned . . . I have a couple “healthy” summer treats headed your way where I’ll put this Homemade Dark Chocolate Magic Shell to good use.

Homemade Dark Chocolate Magic Shell
Mimi’s Fit Foods
Adapted from Gimme Some Oven

Ingredients:
1 cup dark chocolate chips (mine were 63% cacao – brand was E Guittard)
2 tablespoons virgin organic coconut oil

Directions:
Stir together chocolate chips and coconut oil in a large microwave-safe bowl. Place in microwave and cook on high for 30 seconds. Remove and stir. Continue microwaving and stirring in 15 second intervals until all of the chocolate is melted. Remove and let sit until the chocolate reaches room temperature.
Serve with ice cream or fruit. Can be covered and stored at room temperature (not in a refrigerator) for up to 1 month.

Serves 11.

Nutritional Information (Per Serving = 1 Tablespoon):
123 Calories | 0g Protein | 13g Carbs | 9g Fat (6.6g = Sat.) | 1.5g Fiber | 10.2g Sugar

Lime Kissed Fruit Salad

Lime Kissed Fruit Sald | Mimi's Fit Foods

With it being summer and having all this lovely fruit in season, fruit salads are all the craze!  I absolutely love eating fresh fruit in the summer and find that it makes a delicious, light, and beautiful side dish to almost any meal.  That being said, this has become my most favorite way to serve it as of late!

This fruit salad is oh-so-simple, takes very little time, and seriously takes that fresh fruit up a gazillion notches to SUPER awesome!  I’ve been toting this fruit salad to family and friend BBQ’s all summer long and every. single. time. I am asked how to make it because everyone is drooling over every bite.

I’ve found that the fruit options are endless.  I typically make it with whatever fruit I have on hand or with whatever fruit I am in the mood for.  Being summer . . . there is usually melon and strawberries in it for sure.  Then, I add others.  You can change things up to your liking.

One little note that I must mention is that you should not “dress” this salad until it is time to eat it.  It only lasts a couple of hours before going “mushy” and gets all juicy.  (I mean, the mushy and juicy fruit is still to-die-for, but you know . . . not the most optimal to serve.)

All I’m saying is that if you want to be praised for your little-to-no-effort salad, this is it folks!  Make it for your next BBQ.  Or, if you don’t have a BBQ, make it for yourself.  You’ll be in heaven!  And, keep it in mind for the fall/winter months too because it’s even delicious with canned fruit.  No kidding!

Lime Kissed Fruit Salad
Mimi’s Fit Foods
Adapted from Mel’s Kitchen Cafe

Ingredients:
3 cups watermelon, cubed
2 cups strawberries, quarters
1 cup grapes, halved (red or green)
1 (11 ounce) can mandarin oranges, drained well
1 banana sliced
zest from one lime
2 tablespoons honey

Directions:
Combine the fruit in a medium-large serving bowl. Add the lime zest and gently toss.
Drizzle the honey over the fruit and again, gently mix until the fruit is evenly coated with the honey. Serve.

Nutritional Information (Per Serving = 1/2 Cup):
43.3 Calories | 0.4g Protein | 11g Carbs | 0.1g (0g = Sat.) Fat | 0.9g Fiber | 8.8g Sugars

Friday Feature – Half Marathon Bliss

Half Marathon Bliss_2014-6 | Mimi's Fit Foods

Last weekend was fun times!  I ran a Half Marathon down one of my most favorite canyons.  That alone, usually calls for bliss.  However, this year called for more bliss.  In addition to running with some of my favorite running buddies, my brother joined me for his very first half!  This is utterly amazing and special, folks!

Why you might ask?  Well, this cool dude took a serious turn towards a healthy lifestyle and over the last year or so, he has dropped nearly 200 pounds and he can run like the wind!  He eats incredibly healthy, watches portion sizes like a hawk, and he exercises like a champion.

With his permission, he has allowed me to share his Before-After photo.  A.Maze.Ing!  Need I say more?

Half Marathon Bliss_2014-4

So, needless to say, this Half Marathon was indeed a blissful one for more than one reason.

True to form, this half marathon started bright and early.  Race time was at 6am, and we loaded the busses at 4:30am to be taken to the drop-off point in the canyon.  It was still dark when we got there.

Half Marathon Bliss_2014-1 | Mimi's Fit Foods

Race day is always soooo much more fun when I’m in good company.


Half Marathon Bliss_2014-2 | Mimi's Fit Foods

Here I am with my sister-in-law, Becca and one of my best friends, Jen. I love these girls. They totally rock!


Half Marathon Bliss_2014-3 | Mimi's Fit Foods

Here I am at the start line with my bro. As you can see, the scenery is gorgeous. Which, makes the run that much more enjoyable!

I ran with my brother throughout the entire race.  We ran the whole way and only stopped at a few of the aid stations for water.  Here we are at mile 9-ish.  We had some family members come to cheer us on.  While they only saw us for a minute, seeing their faces and hearing their cheers was a nice re-charge for us!

Half Marathon Bliss_2014-5 | Mimi's Fit Foods

After crossing the finish line, I was so excited to see two of my most greatest supporters!  My hubby has given up so many Saturday mornings so that I can get my long runs in.  Trust me; this is a huge sacrifice for him.

Half Marathon Bliss_2014-7 | Mimi's Fit Foods

And, my little angel has often times spent more time in the jogging stroller than she would ever care for.  They are both troopers and I’m lucky to have their support!

Half Marathon Bliss_2014-8 | Mimi's Fit Foods

Seriously!  I had such a great time.  One of my most memorable 13.1 miles ever.  We’re all committing to do it again next year.  Come join us!  We would love to have you.  You have a year to get ready.  No excuses!

Honey-Glazed Carrots

Honey-Glazed Carrots || Mimi's Fit Foods

Here is a tasty vegetable side dish that goes well with SO many main dishes!  When I was growing up, my mom would sometimes make cooked carrots that simmered in brown sugar and butter.  Oh, they were soooo good!  I mean, no wonder!  Sugar and butter?  Yeah . . . that explains it all.

Needless to say, they definitely weren’t the healthiest, despite that they were a vegetable side dish.  Well, this recipe brought those childhood memories to life.  While this is a much healthier way to prepare the carrots, you’ll find that the sweetness of the carrots is intensified and boring carrots are made exciting.  We gobbled these up when I made them and I plan to put them in the vegetable rotation.  After all, my sweet toddler does have carrots at the top of her favorite food list.  And, now we do too!

Honey-Glazed Carrots
Mimi’s Fit Foods
Adapted from America’s Test Kitchen

Ingredients:
1 pound baby carrots, sliced in half
1/3 cup low-sodium chicken broth
slat and pepper
1 1/2 tablespoons honey
2 teaspoons light butter (I used Land of Lakes)

Directions:
Bring the carrots, broth, and 1/4 teaspoon salt to a simmer in a 12-inch nonstick skillet over medium-high heat. Cover, reduce the heat to medium, and cook until the carrots are almost tender, about 5 minutes.

Uncover, increase the heat to medium-high, and simmer rapidly until the liquid measures about 2 tablespoons, 2 to 3 minutes. Stir in the honey and butter and continue to cook, stirring often, until the carrots are completely tender and the sauce has reduced to a light golden glaze, about 4 minutes.

Off the heat, season with salt and pepper to taste, and serve.

Serves 4.

Nutritional Information (Per Serving = 1/4 the Recipe):
80 Calories | 1.6g Protein | 17.4g Carbs | 1g Fat (0g = Sat.) | 2.7g Fiber | 13.1g Sugars

Rosemary, Garlic and Lemon Chicken Kabobs

Rosemary, Garlic and Lemon Chicken Kabobs | Mimi's Fit Foods

Grilling season is in full swing and these kabobs were one of the very first things we threw on the grill this summer.  They are so, so, SO good.  The flavors are summery fresh and they all meld together incredibly well.  We’re talking rosemary, garlic and lemon!  Amazing!  There’s plenty of each of these ingredients in the marinade, so there is no lack of flavor whatsoever.

And, if that isn’t convincing enough, the chicken is incredibly moist (so long as you don’t over cook).  The base for the marinade is buttermilk and while it provides nice tang, it also makes that chicken nice and juicy!

We like to add bell peppers and red onion to our kabobs.  There are various opinions on whether you should grill your veggies separate from your meat.  The main argument for this is so that you can cook each to the level of doneness you prefer since they rarely get done at the exact same time.  I am not picky with the level of doneness on my veggies (I find that they’re slightly still crisp once the chicken is done . . . and I love them like that anyways), so I combine my meat and veggies on the same skewer.  Plus, I think it looks prettier.  However, if you’re one that likes your veggies cooked to a perfect doneness (per your opinion), then put your meat and veggies on separate skewers.

You seriously gotta make these this summer.  Probably more than once!  Again, they are so, so, SO good!

Rosemary, Garlic and Lemon Chicken Kabobs
Mimi’s Fit Foods
Adapted from America’s Test Kitchen

Ingredients:
1 1/2 pounds boneless, skinless chicken breasts, trimmed and cut into 1 1/4-inch pieces
3/4 cup lowfat buttermilk
2 tablespoons minced fresh rosemary
1 tablespoon extra virgin olive oil
3 garlic cloves, minced
1 1/2 teaspoons grated lemon zest, plus
1 tablespoon fresh lemon juice
1 teaspoon salt
1/2 teaspoon pepper
2 red, yellow, or orange bell peppers, stemmed, seeded, and cut into 1-inch pinches
1 large red onion, cut into 1-inch squares
lemon wedges (for serving)

Directions:
Pepare marinade by combining buttermilk, rosemary, olive oil, minced garlic, lemon zest, lemon juice, salt, and pepper in a small-medium bowl. Whisk to combine.

Combine the chicken and marinade in a large zipper-lock bag, press out the air, and seal the bag tightly. Toss to coat the meat and let marinate in the refrigerator for at least 1 hour or up to 6 hours, flipping the bag occasionally.

Thread the marinated chicken, peppers, and onion onto 12 skewers in an alternating pattern, then brush with leftover marinade.

Prepare grill. IF USING A GAS GRILL: Turn all the burners to high, cover, and heat the grill until hot. Turn all the burners to medium-high. IF USING A CHARCOAL GRILL: Open the bottom grill vents completely. Light a large chimney starter three-quarters full with charcoal briquettes. When the coals are hot, pour them in an even layer over the grill.

Set the cooking grate in place, cover, and heat the grill until hot.

Clean and oil the cooking grate. Place the kabobs on the grill and cook, turning as needed, until the chicken and vegetables are lightly charred on all sides and the chicken registers 160 to 165 degrees on an instant-read thermometer (or until juices run clear), 8-12 minutes.

Transfer the kabobs to a platter, tent loosely with aluminum foil, and let rest for 5 minutes. Serve with lemon wedges.

Serves 6.

Nutritional Information Per Serving (2 Kabobs):
147.5 Calories | 24.9g Protein | 7.1g Carbs | 3.9g Fat (0.5g = Sat.) | 1g Fiber | 3.1g Sugars

Slow Cooker Sweet Potatoes

Slow Cooker Sweet Potatoes | Mimi's Fit Foods

So, I’ve thrown regular, ol’ potatoes in the slow cooker, so I’m not sure why I didn’t think about throwing the sweet potatoes in there too.  But, my sweet friend Kristy over at Sweet Treats and More does it all of the time and once the idea entered my mind, there was no leaving it!  Thanks Kristy!

We LOVE sweet potatoes at our house.  They’re such a great choice when it comes to healthy side dishes, but they definitely take some time to cook in the oven.  And, I don’t always think that far ahead.  Besides that, turning on the oven in the summer time for more than an hour sound like WAY too much heat in the kitchen.  Thus . . . the fabulous slow cooker.  While the slow cooker reminds a lot of us of comfort food for the fall and winter months, it is a miracle worker in the summer too.  It avoids extended time of oven heat.  And, that is certainly the case with these sweet potatoes.

The even greater part about throwing the sweet potatoes in the slow cooker is that they come out soooooo incredibly perfect and fluffy.  We love to put some coconut oil or light butter on them and then sprinkle with cinnamon.  Seriously so yummy!

Now that summer is here, we’ve been throwing these Sweet Potatoes in the slow cooker and then when dinner comes around, we’re throwing meat on the grill to eat alongside them.  It’s pretty perfect really.  It takes little-to-no effort, but our meals have been incredible!

Slow Cooker Sweet Potatoes
Mimi’s Fit Foods
Adapted from Kristy at Sweet Treats and More

Ingredients/Supplies:
4-6 large sweet potatoes
foil
cooking spray

Directions:
Lightly coat your slow cooker with cooking spray (some of the juices of the sweet potatoes usually leak out of the foiled sweet potatoes and spraying your slow cooker will help with clean up).

Wash sweet potatoes and pat dry. Wrap each potato in foil and place in the slow cooker.
Cook on low for 6-8 hours or on high for 3-4.

Nutritional Information Per Large Sweet Potato:
162 Calories | 3.6g Protein | 37.3g Carbs | 0.3g Fat (0.1g = Sat.) | 5.9g Fiber | 15.2g Sugars

Fit Homemade Spaghetti Sauce

Fit Homemade Spaghetti Sauce | Mimi's Fit Foods

I’ve said it before, but my hubby is not the biggest fan of traditional Spaghetti (thus this and this), but I am.  We had a lengthy discussion about this and what it came down to was the sauce.  He’s just not a fan of the bottled/canned sauces that are available to purchase on the grocery isle.  So, I set out to make us a homemade sauce that would make all of our tummies smile.  Here’s what did the trick!

The secret to most GREAT sauces is the opportunity to let them simmer for a nice amount of time.  While this sauce takes only a few minutes to prepare, it does require a nice 45-minute simmer.  So, plan ahead.  The simmering is where all the magic happens, so don’t be messing with that step if you mess with anything.

I love the balance of textures found in the sauce.  I used a combination of diced tomatoes and crushed tomatoes and I think it yielded some fabulous texture.

The spice combination is pretty perfect too!  If I wasn’t feeding a 2-year-old, I may have added a bit more crushed red pepper . . . but what I have in the recipe is definitely enough to give is a slight punch without really even noticing it’s there. And, you’ll find all your traditional Italian spices in there too.

Fit Homemade Spaghetti Sauce - Mimi's Fit Foods

I must note that I used no added sugars.  Sugars are typically added to most spaghetti sauces.  I was hoping that this sauce would taste well without it, and I am happy to report that it’s not even missed . . . not one bit!

You can easily use lean ground beef in the recipe.  I chose to use ground turkey to save a little on calories and fat, but they can be interchangeable.

This recipe makes a lot of sauce.  I like it that way because then I can freeze it and use it for later (without having to do any of the work).  It freezes beautifully.

I like to serve this sauce on top of whole wheat noodles of any kind.  It would also be delicious served over spaghetti squash.  Seriously  . . . I’m so glad to have this recipe because now we can have spaghetti a little more often with smiles all-around!  Homemade is always better, isn’t it!?

Fit Homemade Spaghetti Sauce
Mimi’s Fit Foods
Adapted from Tastes of Lizzy T

Ingredients:
2 pounds ground turkey
1 medium yellow onion, chopped
4 cloves garlic, minced
1 (15-ounce) can crushed tomatoes
2 (14.5-ounces each) cans Italian diced tomatoes, with juice
1 (6-ounce) can tomato paste
1 cup water
2 teaspoons salt
2 teaspoons lemon juice
2 tablespoons extra virgin olive oil
2 teaspoons dried oregano
2 teaspoons dried basil
1 teaspoon dried thyme
1/2 teaspoon crushed red pepper

Directions:
In a large saucepan, brown the ground turkey along with the chopped onion. Drain, if necessary.

Add in the rest of the ingredients and bring to a low boil, stirring often. Once the sauce is heated through and at a low boil, reduce the burner temperature to low and simmer uncovered for 45 minutes, stirring occasionally.

Yields Approximately 13 Cups.

Nutritional Information (Per 1/2 Cup):
77 Calories | 7.9g Protein | 4.1g Carbs | 3.6g Fat (0.9g = Sat.) | 0.6g Fiber | 2.5g Sugars