Slow Cooker Asian Chicken Sandwiches

Slow Cooker Asian Chicken Sandwiches - Mimi's Fit Foods

The cold weather and sick season attacked our home this past week.  We’ve been down-and-out.  We’ve been living off of soup and protein smoothies around here.

However, there was one day this week when I actually found the energy to throw this meal in the slow cooker.  I’m so glad I did too!  It was super duper easy and the results were quite tasty!  I love using my slow cooker on days when I feel lazy or tired or busy.  I can basically get my meal made in the morning and there are little-to-no dishes when dinner time rolls around.  (That, to me, is the TRUE bonus of slow cooking!)

The flavor of these is definitely Asian-inspired (thus, the recipe name, LOL).  What really makes them taste Asian is the lime, cabbage, and cilantro.  The ginger in the sauce helps too.  The chicken/sauce is very mild and all the toppings bring it to a nice, fresh level.

This is a great weeknight meal.  If I can pull it off while on my sick bed, I’m pretty sure anyone can pull it off!  This is a slow-cooker keeper for sure!

Slow Cooker Asian Chicken Sandwiches
Adapted from Get Crocked

1 1/2 pounds boneless, skinless chicken breasts
1 small onion, chopped
2 teaspoons freshly grated ginger
3-4 cloves garlic, minced
1 cup ketchup
2 tablespoons brown sugar
4 tablespoons lime juice, divided
2 cups shredded red cabbage
1/2 cup red onion, sliced
fresh cilantro, chopped
6 whole wheat thin buns, for serving

Add chicken to slow cooker.  Combine onion, ginger, garlic, ketchup, brown sugar, and 2 tablespoons of the lime juice in a small bowl.  Pour over chicken in slow cooker.  Cover and cook on low for 6 hours.

When chicken is done, remove from sauce, shred, and return to sauce.  Change slow cooker to warm setting.

When ready to serve, place chicken on thin bun and top with cabbage, red onion, fresh cilantro, and a splash of fresh lime juice.

Serves 6.

Nutritional Information (Per Serving = 1 Sandwich)
Calories:  297.8
Protein:  29g
Carbs:  44.3g
Fat:  2.7g (0g = Sat.)
Fiber:  6.4g
Sugars:  19.7g

Chicken, Butternut Squash and Quinoa Stew

Chicken, Butternut Squash and Quinoa Stew - Mimi's Fit Foods

Yuuuuuummmmm.  This was soooooo tasty!  When I first read about this stew and the blogger said she would give it a 15 out of 10, I was sold!  And, I’m gonna have to totally agree with the rating.  It’s so hearty and I loved the flavor combination of the chicken, butternut squash and quinoa.  I thought the Kalamata olives were a weird addition, but I was too curious to not throw them in.  I’m glad I kept them in the recipe because they give a nice salty and distinct bite to the stew.  The herbs are perfect in here.  There’s a nice dominate oregano flavor and the fresh parsley gives it that perfect finish.

It’s gotten really cold around these parts and this stew was perfect on a cold night.  I can’t WAIT to eat the leftovers.  This is for sure jumping to the top of my list of cold-weather favorites!

Chicken, Butternut Squash and Quinoa Stew
Adapted from Cookin’ Canuck

2 lb. butternut squash, peeled, seeded & chopped into 1/2-inch pieces
4 cups chicken broth (99% Fat Free)
1 1/2 lb. boneless, skinless chicken breasts
1/2 tbsp extra virgin olive oil
1 medium yellow onion, finely chopped
1/2 tsp kosher salt
4 cloves garlic, minced
1 1/2 tsp dried oregano
1 can (14 oz) petite diced tomatoes
2/3 cup uncooked quinoa
3/4 cup pitted and quartered kalamata olives
Freshly ground black pepper, to taste
1/4 cup minced fresh flat-leaf parsley

Steam the butternut squash until barely tender, about 10 minutes. Remove half of the squash pieces and set aside.

Steam the remaining squash until very tender, an additional 4 to 6 minutes. Mash this squash with the back of a fork. Set aside.

In a large saucepan set over medium-high heat, bring the chicken broth to a simmer.  Add chicken breasts, cover, and cook until chicken is cooked through, about 15 minutes.  Transfer the chicken to a plate and allow to cool. Pour broth into a medium-sized bowl.

Return the saucepan to the stovetop and lower heat to medium. Add olive oil.  Add onion and cook, stirring occasionally, until onion is starting to turn brown, 8 to 10 minutes.

Add the salt, minced garlic and oregano. Cook, stirring, for 1 additional minute.

To the saucepan, add tomatoes, butternut squash pieces, mashed butternut squash. Stir to combine.

Stir in reserved chicken broth and quinoa. Bring to a simmer, cover and cook until the quinoa turns translucent, about 15 minutes.

Shred the chicken with your fingers or a fork.

Stir the chicken, olives and pepper into the stew and simmer, uncovered, to heat, about 5 minutes.

Stir in parsley and serve.

Serves 6.

Nutritional Information (Per Serving = Approx. 2 Cups)
Calories:  295.2
Protein:  28.7g
Carbs:  36.4g
Fat:  5g
Fiber:  7g
Sugars:  4.2g

Whole Wheat Banana Protein Pancakes

Whole Wheat Banana Protein Pancakes - Mimi's Fit Foods

We love pancakes at our house.  As soon as my baby girl sees pancakes on the griddle she starts chanting, “Num, Num.”  It about kills her to wait the 4-5 minutes for them to cook.  Because we eat them so often, I try to mix things up and make different varieties during the week.  I recently gave these a try and they’re a winner!  The amazing thing is that you don’t add a lick of sugar!  The mashed banana sweetens the pancakes perfectly.  In addition, the banana flavor really does shine through on these.  Another great health benefit is that these are very high in fiber, which also makes them very filling.

I’ve created the recipe to fit a serving size where you can simply just eat the pancakes for breakfast.  They have enough proteins, carbs (grains and fruits), and fats.  However, if you prefer, you can always dial your serving size down to 2 pancakes and eat an egg too.

We like to top our pancakes with sugar-free maple syrup (only 10-20ish extra calories).  Bananas and maple flavor just go well together.  That being said, I think they are good enough on their own.  So, if you need a breakfast that you can grab and eat on your way out the door, these will certainly fit the bill.

Here’s to another healthy, well-balanced, and tasty breakfast!

Whole Wheat Banana Protein Pancakes
Adapted from Vega Sport

1 medium banana, mashed
1 teaspoon vanilla extract
1 cup low fat milk
1 cup whole wheat flour
1 scoop whey vanilla protein (100 calories & 26g Protein per scoop)
1 teaspoon baking powder
1 teaspoon baking soda
1/4 teaspoon cinnamon
coconut oil or non-stick cooking spray (for greasing pan/griddle)

Whisk together banana, vanilla, and milk.  Set aside.

In a separate bowl mix remaining dry ingredients.

Incorporate the dry ingredients into the wet, mix until just combined.

Melt coconut oil in a non-stick pan over medium heat, or use a griddle.  Add a quarter cup of the batter to the pan/griddle.  Flip once bubbles have formed and popped.  Cook another 1-2 minutes or until pancake is cooked through.  Repeat.  Makes approximately 8 pancakes.

If desired, top with fresh fruit and/or sugar-free maple syrup.

Serves 3.

Nutritional Information (Per Serving = Approx. 2.5 Pancakes, No Toppings)
Calories:  209
Protein:  11.8g
Carbs:  40.1g
Fat:  1.5g (0.5g = Sat.)
Fiber:  6.2g
Sugas:  5.7g

*Other Nutritional Notes:  If you get 8 pancakes out of your batter, each pancake is approximately 78 calories (4.4g protein, 15g carbs). 

Herb Roasted Chicken Breast With Butternut Squash

Herb Roasted Chicken with Butternut Squash - Mimi's Fit Foods

This dish SCREAMS fall!  We’re talking herbs, chicken and squash.  Butternut squash . . . my fave!  Everything here has a nice, fresh rosemary undertone while letting all the natural flavors of each ingredient shine through.  The chicken also has a nice apricot glaze which complements the rosemary and squash beautifully!  This meal comes together quick and I am a big fan of quick these days!  I love that I can cook my protein and my carbohydrate at the same time and all I have to do is prepare a veggie while the main stuff is in the oven.

This meal would be good whenever, but we had it on a nice fall evening and we definitely left the dinner table feeling all nice and cozy inside.

Herb Roasted Chicken with Butternut Squash2 - Mimi's Fit Foods

Herb Roasted Chicken Breast with Butternut Squash
Adapted from Self

4 skinless, boneless chicken breasts (1 pound total)
2 tablespoons chopped fresh rosemary, divided
salt, to taste
pepper, to taste
1 pound peeled, seeded and cubed butternut squash
1 1/2 teaspoons extra virgin olive oil, divided
3 small sweet onions, quartered
3 teaspoons balsamic vinegar, divided
2 tablespoons apricot preserves
2 teaspoons Dijon mustard
1 teaspoon minced ginger
1 clove garlic, minced

Position rack in the lower third of oven; heat oven to 400 degrees.  Season chicken with 1 tablespoon chopped rosemary, salt and pepper.

In a bowl, toss squash with 1 teaspoon olive oil, salt and pepper.

In a second bowl, toss onions with 2 teaspoons vinegar and 1/2 teaspoon olive oil.

Coat a rimmed baking sheet pan with cooking spray.  Place chicken on pan; spread squash and onion in a single layer around chicken; sprinkle vegetables with remaining 1 tablespoon chopped rosemary.

Roast 15 minutes.  While roasting, combine preserves, mustard, ginger, garlic and remaining 1 teaspoon vinegar in a small bowl.  After the first 15 minutes of roasting brush the apricot-mustard sauce on chicken and continue roasting until chicken’s internal temperature reaches 165 degrees, about 10 to 15 minutes more.

Divide chicken and veggies among 4 plates and garnish each with a sprig of rosemary if desired.

Serves 4.

Nutritional Information (Per Serving = 1/4 the Recipe)
Calories:  211.8
Protein:  24.4g
Carbs:  22.9g
Fat:  3.5g (0.4g = Sat.)
Fiber:  4g
Sugars:  8.3g

Fresh Green Bean Salad With Balsamic Dressing

Fresh Green Bean Salad with Balsamic Dressing - Mimi's Fit Foods

Okay.  Let’s get back to fall.  In reality, this dish is perfect year-round, but I’m sharing it this week because I think it would make a fabulous side dish at Thanksgiving.  I’m always looking for healthy side dishes for the holidays and since green beans seem to make an appearance at most Thanksgiving dinner tables, I thought I would share a very YUMMY (and healthy) way to make them this year.

This green bean salad is to-die-for.  Yes, I’m serious.  You’re probably thinking that there’s no way that green beans would ever be considered to-die-for, but guess what!?  You’re totally wrong because I found this recipe and it completely qualifies!  I made a fancy dinner to go alongside these babies and the green beans totally won my hubby over.  Hands down, he said this salad was the best part of the meal.  And, he doesn’t even really like green beans!  So, that’s saying something HUGE!

The green beans are cooked so they are crisp-tender, then placed in an ice bath to stop them from cooking (which also keeps their color a nice, vibrant green) and cools them down.  They are mixed with the grape tomatoes and then drizzled with a simple balsamic dressing.  Just before serving, feta cheese is mixed throughout.  The result . . . delicious, crisp-tender green beans that want you going back for more and more and more and . . . well, you get the idea!  It’s just so good and fresh and flavorful!

Besides being down-right delicious, the salad is pretty too!  I think it is totally worthy for holiday meals and it’s also WAY easy to throw together for any weeknight meal too.  Thus, it’s a recipe to keep in your back pocket.  Right!?

A couple of tips for the beans.  I bought mine at Costco and they were of the best quality.  You can usually find them in your local grocery store (produce section) too.  When cooking the beans, you want to cook them to the tenderness you prefer.  However, you don’t want to let them over-cook or they’ll be mushy and not so awesome.  I prefer mine slightly on the crisp side, so I cooked mine for about 7 minutes.  I wouldn’t cook yours longer than 10.  And, don’t forget to have your ice bath ready because you’ll need to transfer them right to the ice bath after cooking.

Now start planning to make the best green bean recipe you’ve tried in years (or in forever!).

Fresh Green Bean Salad with Balsamic Dressing2 - Mimi's Fit Foods

Fresh Green Bean Salad With Balsamic Dressing
Adapted from Mel’s Kitchen Cafe

1 pound fresh green beans, ends trimmed if desired
1 cup cherry or grape tomatoes, halved
2 tablespoons olive oil
1 1/2 teaspoons freshly squeezed lemon juice
2 tablespoons balsamic vinegar
1/8 teaspoon salt
1/8 teaspoon garlic powder
pepper, to taste
2 ounces reduced fat feta cheese

Bring a medium pot of water to a boil.  Add 1/2 teaspoon salt.  Cook green beans until tender, 5-10 minutes.

While they cook, prepare a large bowl with an ice water bath.  Immediately drain the beans into a colander and place the drained beans in the ice water for a few minutes to stop the cooking.  (This will keep them bright green and perfectly tender.)

Drain the beans and pat them dry.  Toss them in a bowl with the tomatoes.

For the dressing, whisk together the olive oil, lemon juice, vinegar, salt, garlic powder, and pepper.  Pour the mixture over the green beans and toss to coat.  Cover the bowl and chill for at least an hour or up to 3 hours before ready to serve.

Stir in the feta cheese right before serving.  Serve chilled or at room temperature.

Serves 4.

Nutritional Information (Per Serving = 1/4 the Recipe)
Calories:  135.6
Protein:  2.5g
Carbs:  4g
Fat:  8.8g (2g = Sat.)
Fiber:  4g
Sugars:  2.8g

Polynesian Salad With Shrimp and Pineapple Vinaigrette

Polynesian Salad - Mimi's Fit Foods

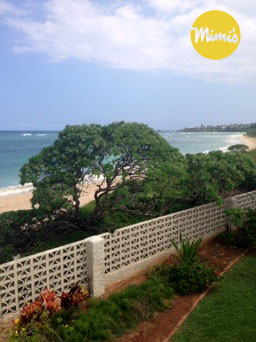
I’m back!  I’ve been on a little (well, kinda huge to our little family) vacation to none other than Hawaii.  This was our first “big” vacation with the baby in tow, and we managed to get through the airport, survive the flights, and have a wonderful time on the island of Oahu.

Hawaii-Mimi's Fit Foods

While this was my view every day from our beach house, I also tried some delicious food (of course!).  One of the spots we frequented was a burger spot in Laie called Seven Brothers and I got myself a salad on our first visit.  The cashier said it was the most popular salad on the menu, so I ordered the Polynesian Salad.  You guys!  It was sooooo good!  In fact, I loved it so much that I had it three times while I was in Hawaii and it was what I chose for my “last meal” before I flew home.  I’m not trying to be dramatic, but I seriously couldn’t get enough of the yummy salad.

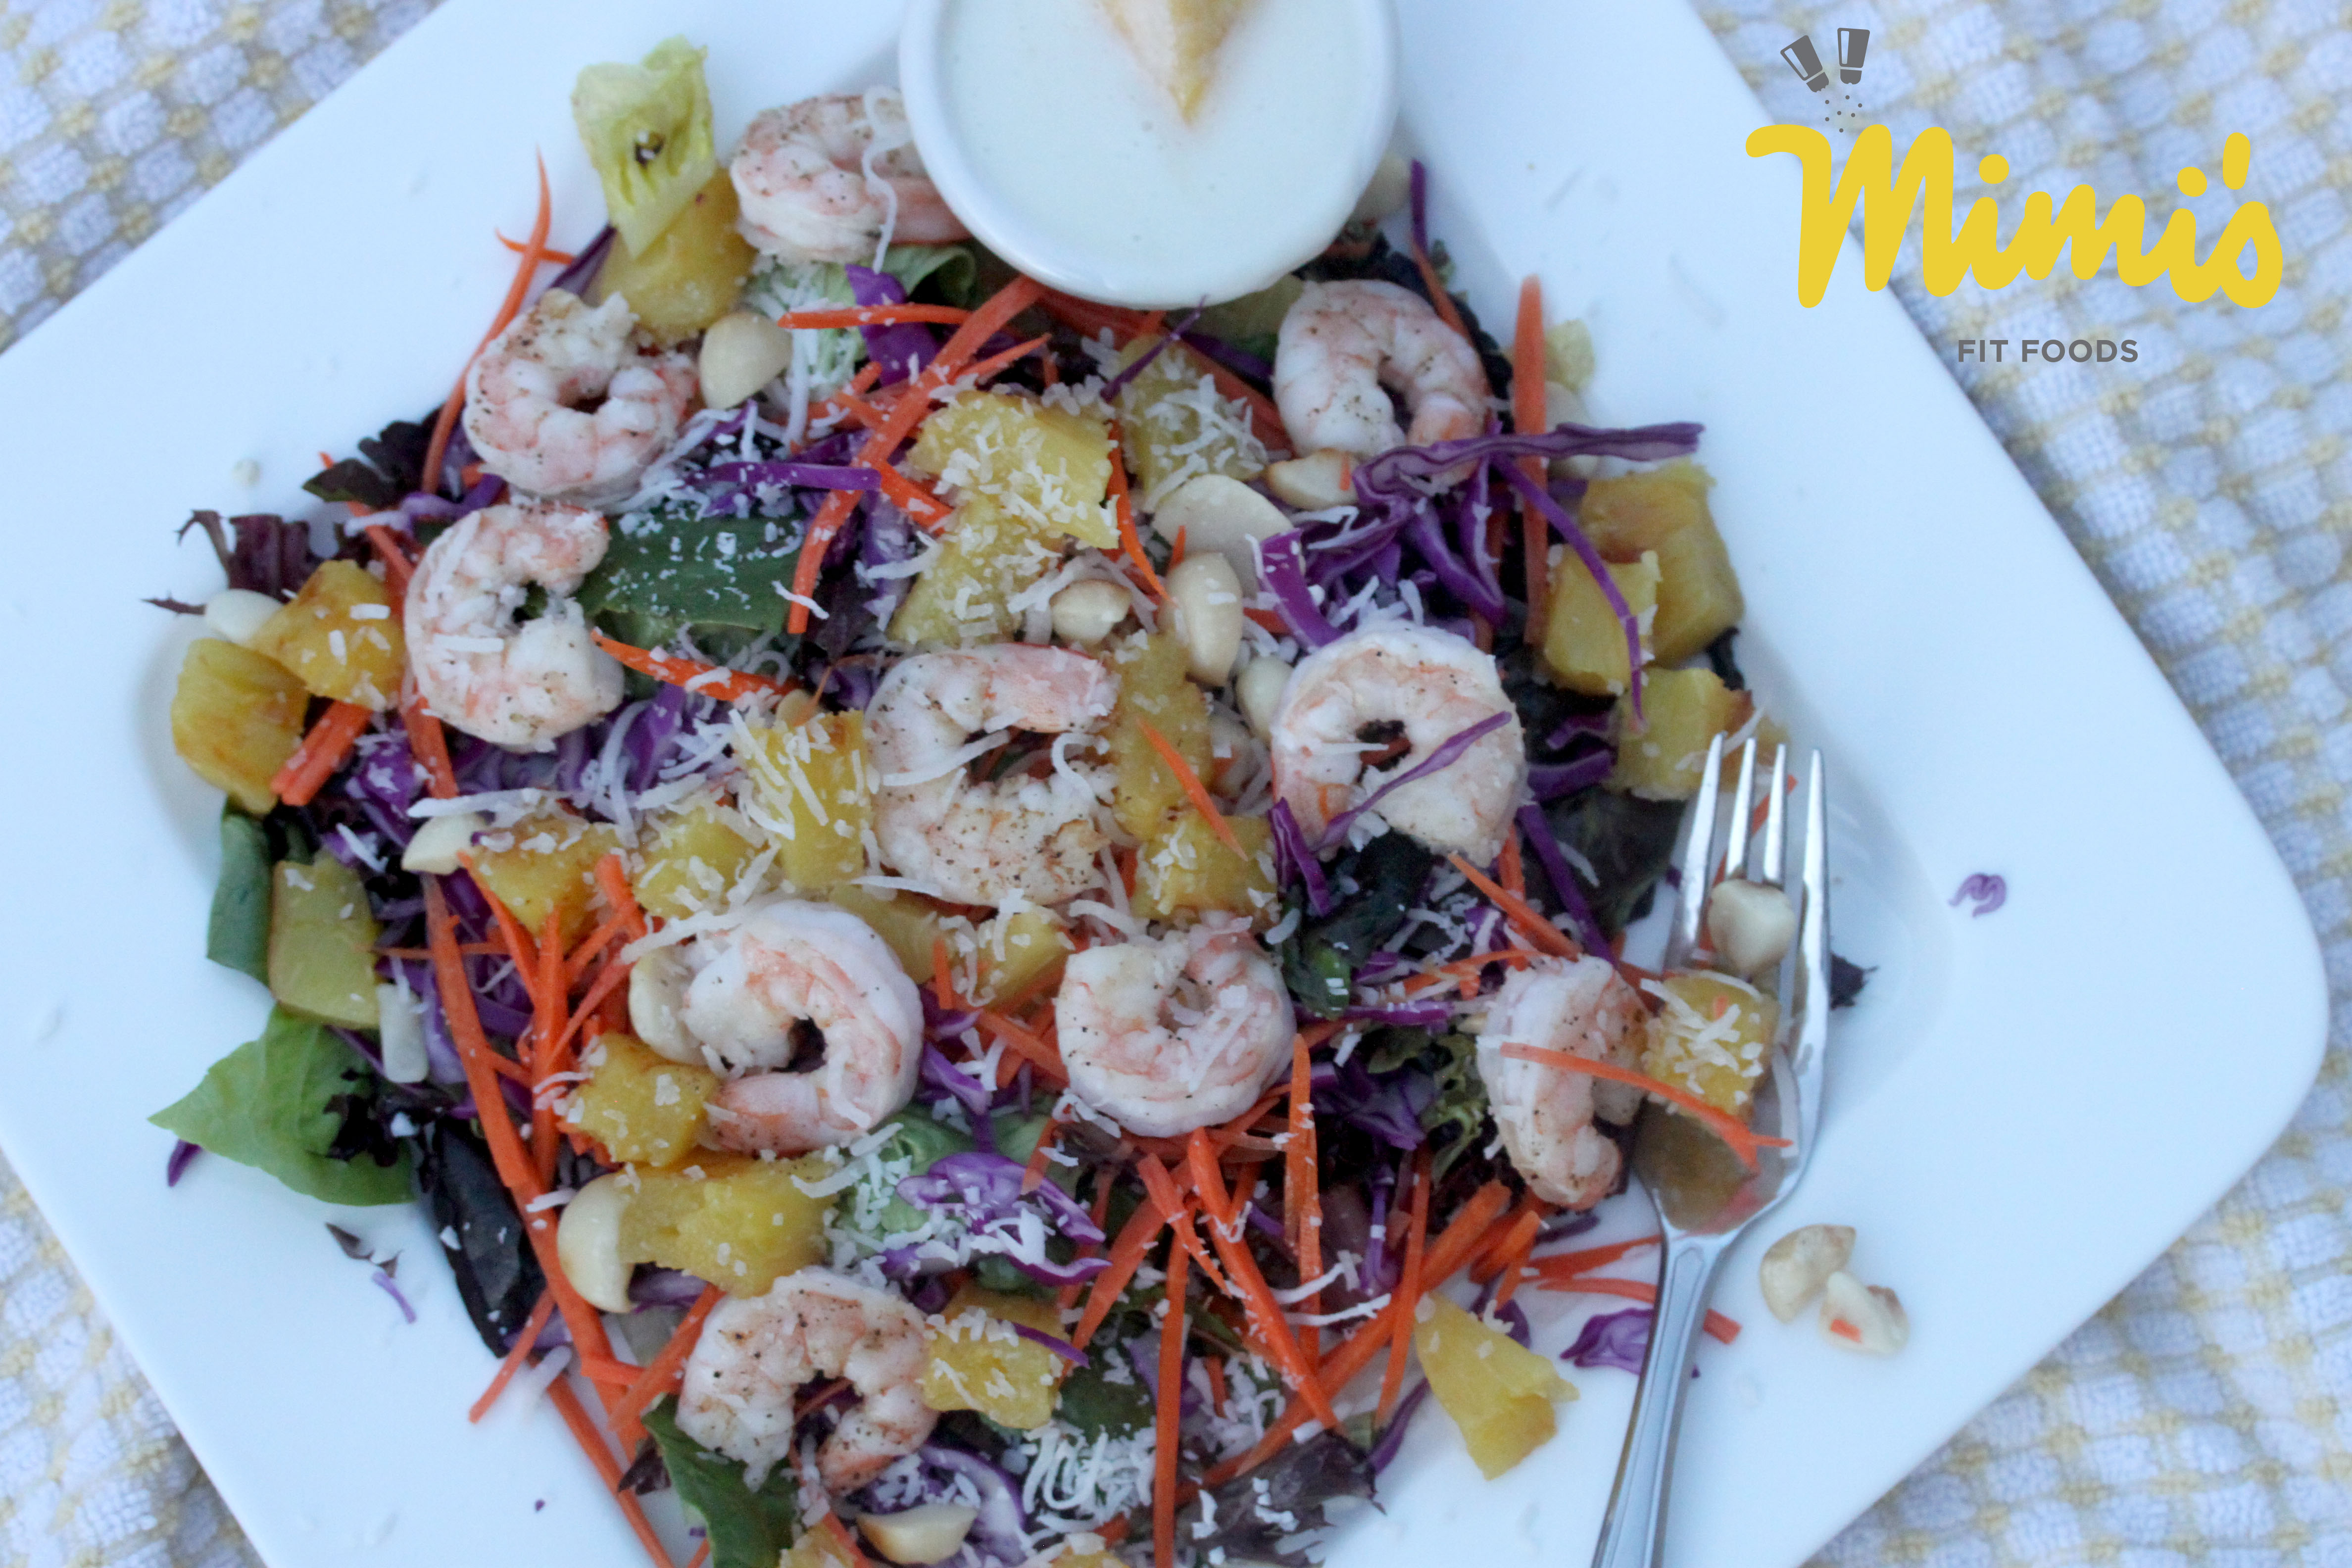
So, while I enjoyed my “last meal” I carefully studied the salad and its flavors so I could try to recreate it at home.  I’ve done it, my friends!  I’ve seriously done it!  When I sat down to eat this for dinner I could almost hear the waves crashing in the background . . . it took me right back to Laie.  It has fabulous texture thanks to the crunch you get from the carrots, cabbage, and nuts.  It also has a balanced sweetness with the grilled pineapple and the coconut.  And the dressing . . . yeah, this is what takes it over the top.  It has a distinct pineapple taste with a slight edge of sophistication because of Blue Cheese.

The Seven Brothers restaurant does not serve their salad with shrimp (although you can add fish to your salad if you want), but I thought shrimp was the perfect addition for a healthy protein.  It was a fabulous compliment to the sweet pineapple flavors found throughout.

Again, I’m not trying to be dramatic, but this salad is absolutely amazing.  I know it doesn’t scream “Autumn,” so perhaps you might think the timing of putting it on the blog is a little off, but it is the BEST thing I could bring home to you all from Hawaii (trust me . . . you would WAY rather have this than one of those cheap key chains from the Swap Meet).  You’re going to love it and so will everyone else who gets a taste.

Aloha!

Polynesian Salad With Shrimp and Pineapple Vinaigrette 

For the Salad:
12 cups (or 16 oz.) mixed greens (I used a Spring mix)
3 medium carrots, chopped fine
2 cups red cabbage, chopped fine
6 fresh pineapple rings, 1/4 thick
24 ounces shrimp, peeled and deveined
2 1/2 oz. macadamia nuts, toasted
1/2 cup, plus 2 tablespoons shredded coconut

For the Dressing:
1/2 cup pineapple juice
3 tablespoons rice wine vinegar
2 tablespoons extra virgin olive oil
1 1/2 teaspoons agave (or honey)
1/2 teaspoon freshly grated ginger root
2 tablespoons blue cheese crumbles
salt and pepper to taste

For the salad:
Combine mixed greens, carrots, and cabbage in a large bowl.  Set aside.

Prepare grill by heating to medium (I used an indoor grill, AKA my George Foreman).  Oil grill grates.  Place pineapple on grill and grill for approximately 3-5 minutes per side, until tender and golden.  Remove from grill and cut into chunks.

If desired, season shrimp with salt and pepper (to taste).  Place on grill and grill for approximately 2 minutes per side, or until shrimp is completely pink/white and it curls up a bit.  Remove from grill and set aside.

If serving for a large crowd, wait for pineapple and shrimp to cool to room temperature and then gently toss with mixed greens.  Add toasted macadamia nuts and coconut and evenly toss.  Serve with dressing.  (Recipe makes enough for 6 good sized dinner portions and would probably serve at least 10-12 people as a side dish.)

If serving individual plates (which I mostly do at home), place approximately 3 cups of greens on a plate, top with pineapple chunks (from one ring), approximately 4 ounces of shrimp (which was about 8-10 of my medium shrimp), 1 tablespoon of nuts, and 2 tablespoons of coconut.  Serve with 2 1/2 tablespoons of dressing.

Serves 6.

For the Dressing:
Put all ingredients in a blender or food processor and process until smooth.

Serves 6.

**Notes about this salad:  The macadamia nuts are high in calories.  If you omit them altogether, you’ll save yourself 80 calories and 9 grams of fat per serving.  They aren’t the healthiest nut to have around, but they are truly Hawaiian so I left them in the recipe.  Omit them if you’re really watching your food intake.  Also, I used fresh pineapple, but I’m sure canned would work in a pinch (and for the dressing you can use the drained pineapple juice from the can).  

Nutritional Information
Salad & Dressing (Per Serving = 1/6 of the Recipe)
Calories:  402.8
Protein:  29.7g
Carbs:  27.2g
Fat:  20.6g (7.4g = Sat.)
Fiber:  6.7g
Sugars:  17g

Nutritional Information
Salad Only (Per Serving = 1/6 of the Recipe)

Calories:  336.7
Protein:  28.6g
Carbs:  22.8g
Fat:  15.2g (6.3g = Sat.)
Fiber:  6.6g
Sugars:  14.2g (all natural sugars)

Nutritional Information
Dressing Only (Per Serving = Approx. 2 1/2 Tablespoons)
Calories:  66
Protein:  1.1g
Carbs:  4.4g
Fat:  5.4g (1.1g = Sat.)
Fiber:  0g
Sugars:  2.9g

Pumpkin Pie Protein Smoothie

Pumpkin Pie Protein Smoothie - Mimi's Fit Foods

I hope you all had a fun and safe Halloween!  Now we get to look forward to Thanksgiving.  What better way to do so than with Pumpkin Pie, I ask?

Here’s a great way to get your protein shake in while TOTALLY appreciating the flavors of pumpkin pie!  It’ll make you feel all cozy on a fall or winter day.  The smoothie surprisingly tastes a whole lot like pumpkin pie and leaves you with that sweet and decadent flavor.  I gotta admit that my favorite part of the smoothie is the the chunks of graham crackers found throughout.  I love the flavor and the crunch.

I’m so happy that I’ve found a way to enjoy pumpkin pie in a healthy and balanced nutrition sort-of-way.  Enjoy!

Pumpkin Pie Protein Smoothie
Adapted from Little Inspiration

1/4 cup canned pumpkin
1/2 cup low fat milk (I used organic, 1%)
1/4 teaspoon ground cinnamon
1 scoop vanilla whey protein powder (100 calories, 15g Protein)
1 cup crushed ice
1/2 graham cracker (or 2 sections), crushed (crumbs for topping)

Put canned pumpkin, milk, cinnamon, and protein powder in blender.  Blend until well-combined and smooth (about 1-2 minutes).  Add ice and blend again until smooth.  Top with graham cracker crumbs.

Serves 1.

Nutritional Information
Calories:  209.8
Protein:  20.2g
Carbs:  24.9g
Fat:  3.7g (1.5g = Sat.)
Fiber:  5.3g
Sugars:  13g

Whole Wheat Pumpkin Pancakes

Whole Wheat Pumpkin Pancakes - Mimi's Fit Foods

It’s totally pumpkin season!  If you are one who loves to cook/bake with pumpkin, you’re going to love today’s post!

I love cooking with pumpkin and when the fall air gets crisp, it’s an immediate craving!  I came across this pancake recipe and knew I had to give it a whirl.  Oh, it was so perfect!  We made these on a cool morning and the pumpkin flavor mixed with cinnamon, and then topped with maple syrup . . . . yeah, it was the perfect fall breakfast!  The whole wheat flour was hardly noticeable, in fact, it made them more hearty and filling.  I was able to squeeze 10 pancakes out of my batter by dropping them with a 1/4 cup measuring cup.

All you pumpkin lovers . . . you really gotta add this to your line-up.

Whole Wheat Pumpkin Pancakes
Adapted from Gina’s Skinny Recipes

1 cup white whole wheat flour
2 teaspoons baking powder
1/4 teaspoon salt
1 teaspoon cinnamon
1/2 teaspoon nutmeg
1 cup buttermilk
3 large egg whites
1/4 cup canned pumpkin
1 tablespoon pure maple syrup (I used Grade B)
1 teaspoon vanilla
2 teaspoons coconut oil (melted)
cooking spray
sugar free maple syrup, for topping (extra)

Mix all dry ingredients (first 5 ingredients) in a medium-large bowl.

Comine buttermilk, egg whites, canned pumpkin, maple syrup, oil and vanilla in a bowl and mix until smooth.  pour wet ingredients into dry ingredients and mix well with a spoon until there are no more dry spots.  Don’t over-mix.

Heat a large skillet on medium-low heat.  Spray oil to lightly coat and pour 1/4 cup of pancake batter.  When the pancake starts to bubble and the edges begin to set, about 2 minutes then flip the pancakes and cook an additional 1 1/2 to 2 minutes.  Repeat with the remainder of the batter.  To serve, top with warmed sugar-free maple syrup.

Serves 5.

Nutritional Information (Per Serving = 2 Pancakes)
Calories:  156.4
Protein:  7.1g
Carbs:  27.6g
Fat:  2.9g (2g = Sat.)
Fiber:  3.6g
Sugars:  8.5g

Skeleton Veggie Tray

Skeleton Veggie Tray - Mimi's Fit Foods

Ok, folks!  The Halloween parties are in full swing for us, so I’m guessing they are for you too!  One of the tips I suggest to my clients when going to parties is to offer to take something healthy that you know you can/should eat.  I mean, let’s be honest.  When we show up to parties there is always a lot of fun food that is loaded with fats and or sugars (admittedly they are usually way yummy, but not good for the belly/hips/thighs . . . ya know!?).  So, I always like to play it safe by taking something healthy that I know I can eat.

A veggie tray is alway a good solution.  However, it can be BORING.  Well, it doesn’t have to be boring for Halloween!  I found this fun way to amp up the fun with a typical veggie tray.  I took this to a family Halloween pot-luck party last weekend and it was eaten up in minutes.  There was another large veggie tray there too, but it had hardly been touched.  I’m still kind of sitting here amazed that the skeleton trick won over the kiddos and got them to eat their veggies.  They seriously ate it up (literally and figuratively).

I made the protein-packed dip from cottage cheese.  If you haven’t made the Fit Ranch Dip/Dressing  yet, you must!  (You will also deceive your little and big people with this dip.)

Hopefully this gives you a fun idea on how to fill up your belly with veggies instead of Halloween candy.  Have fun at all your parties and be safe!